Categories
Makeover Remodel

Sewing Room Makeover

It is said that the hardest part of a journey is taking the first step. I will say I’ve experienced that in various undertakings in my life, but this project wasn’t one of those instances. This project was a slog.  It taxed me physically, mentally, and emotionally.  Spanning 9 weeks but with about 7 weeks of nose to the grindstone, gut busting work. I took a week off around week 7 to take a break and enjoy an X-Men marathon with my wife and oldest son, and then it was back to the project.

I knew I needed to take some time off work to have enough time to concentrate on all I had to do.  I don’t remember how exactly it came about but I believe it was my wife’s suggestion for me to spread my time off over a few weeks by taking half days off instead of full days off.  That turned out to be very prescient for many reasons: One, that gave my body time to rest in between since I have a sit-down day job. Two, I was able to have time to contemplate and plan the next steps. And three, I was able to keep abreast of what was going on at work so as not to be slammed when returning like a normal full-time-off vacation. So, I scheduled 3 weeks of half days or 7.5 days (60 hours) of PTO.  As the end of the 3 weeks approached, I felt I needed a little more time, so I added another week (2.5 days/20 hours).

During those time-off weeks I’d get off work at 1 pm, eat my own lunch, help my 1 and 4-year-old with their lunch, and be down to the shop by 2:00 or so.  Then I’d work until it was time to cook/eat dinner, then head back down for another 2-4 hours depending on how I was feeling and whether or not it made sense to go on to the next step. That made an average of 8 hours a day, 6 days a week for those 4 weeks (192 hours) and the other 3 weeks about 3 hours a day average plus 5-6 on Saturdays (60-80 hours).  So, in all, I’m estimating it took about 275 hours in total, perhaps near 300 hours including all the store trips and touch ups I’m probably forgetting.  And that doesn’t include the man-hours of my kids that did painting and shelf-pin drilling and sanding and sweeping and vacuuming and probably a dozen other tasks I’m forgetting.  All said and done though, it is worth it.  Now onto the fun part, the before and after pictures.

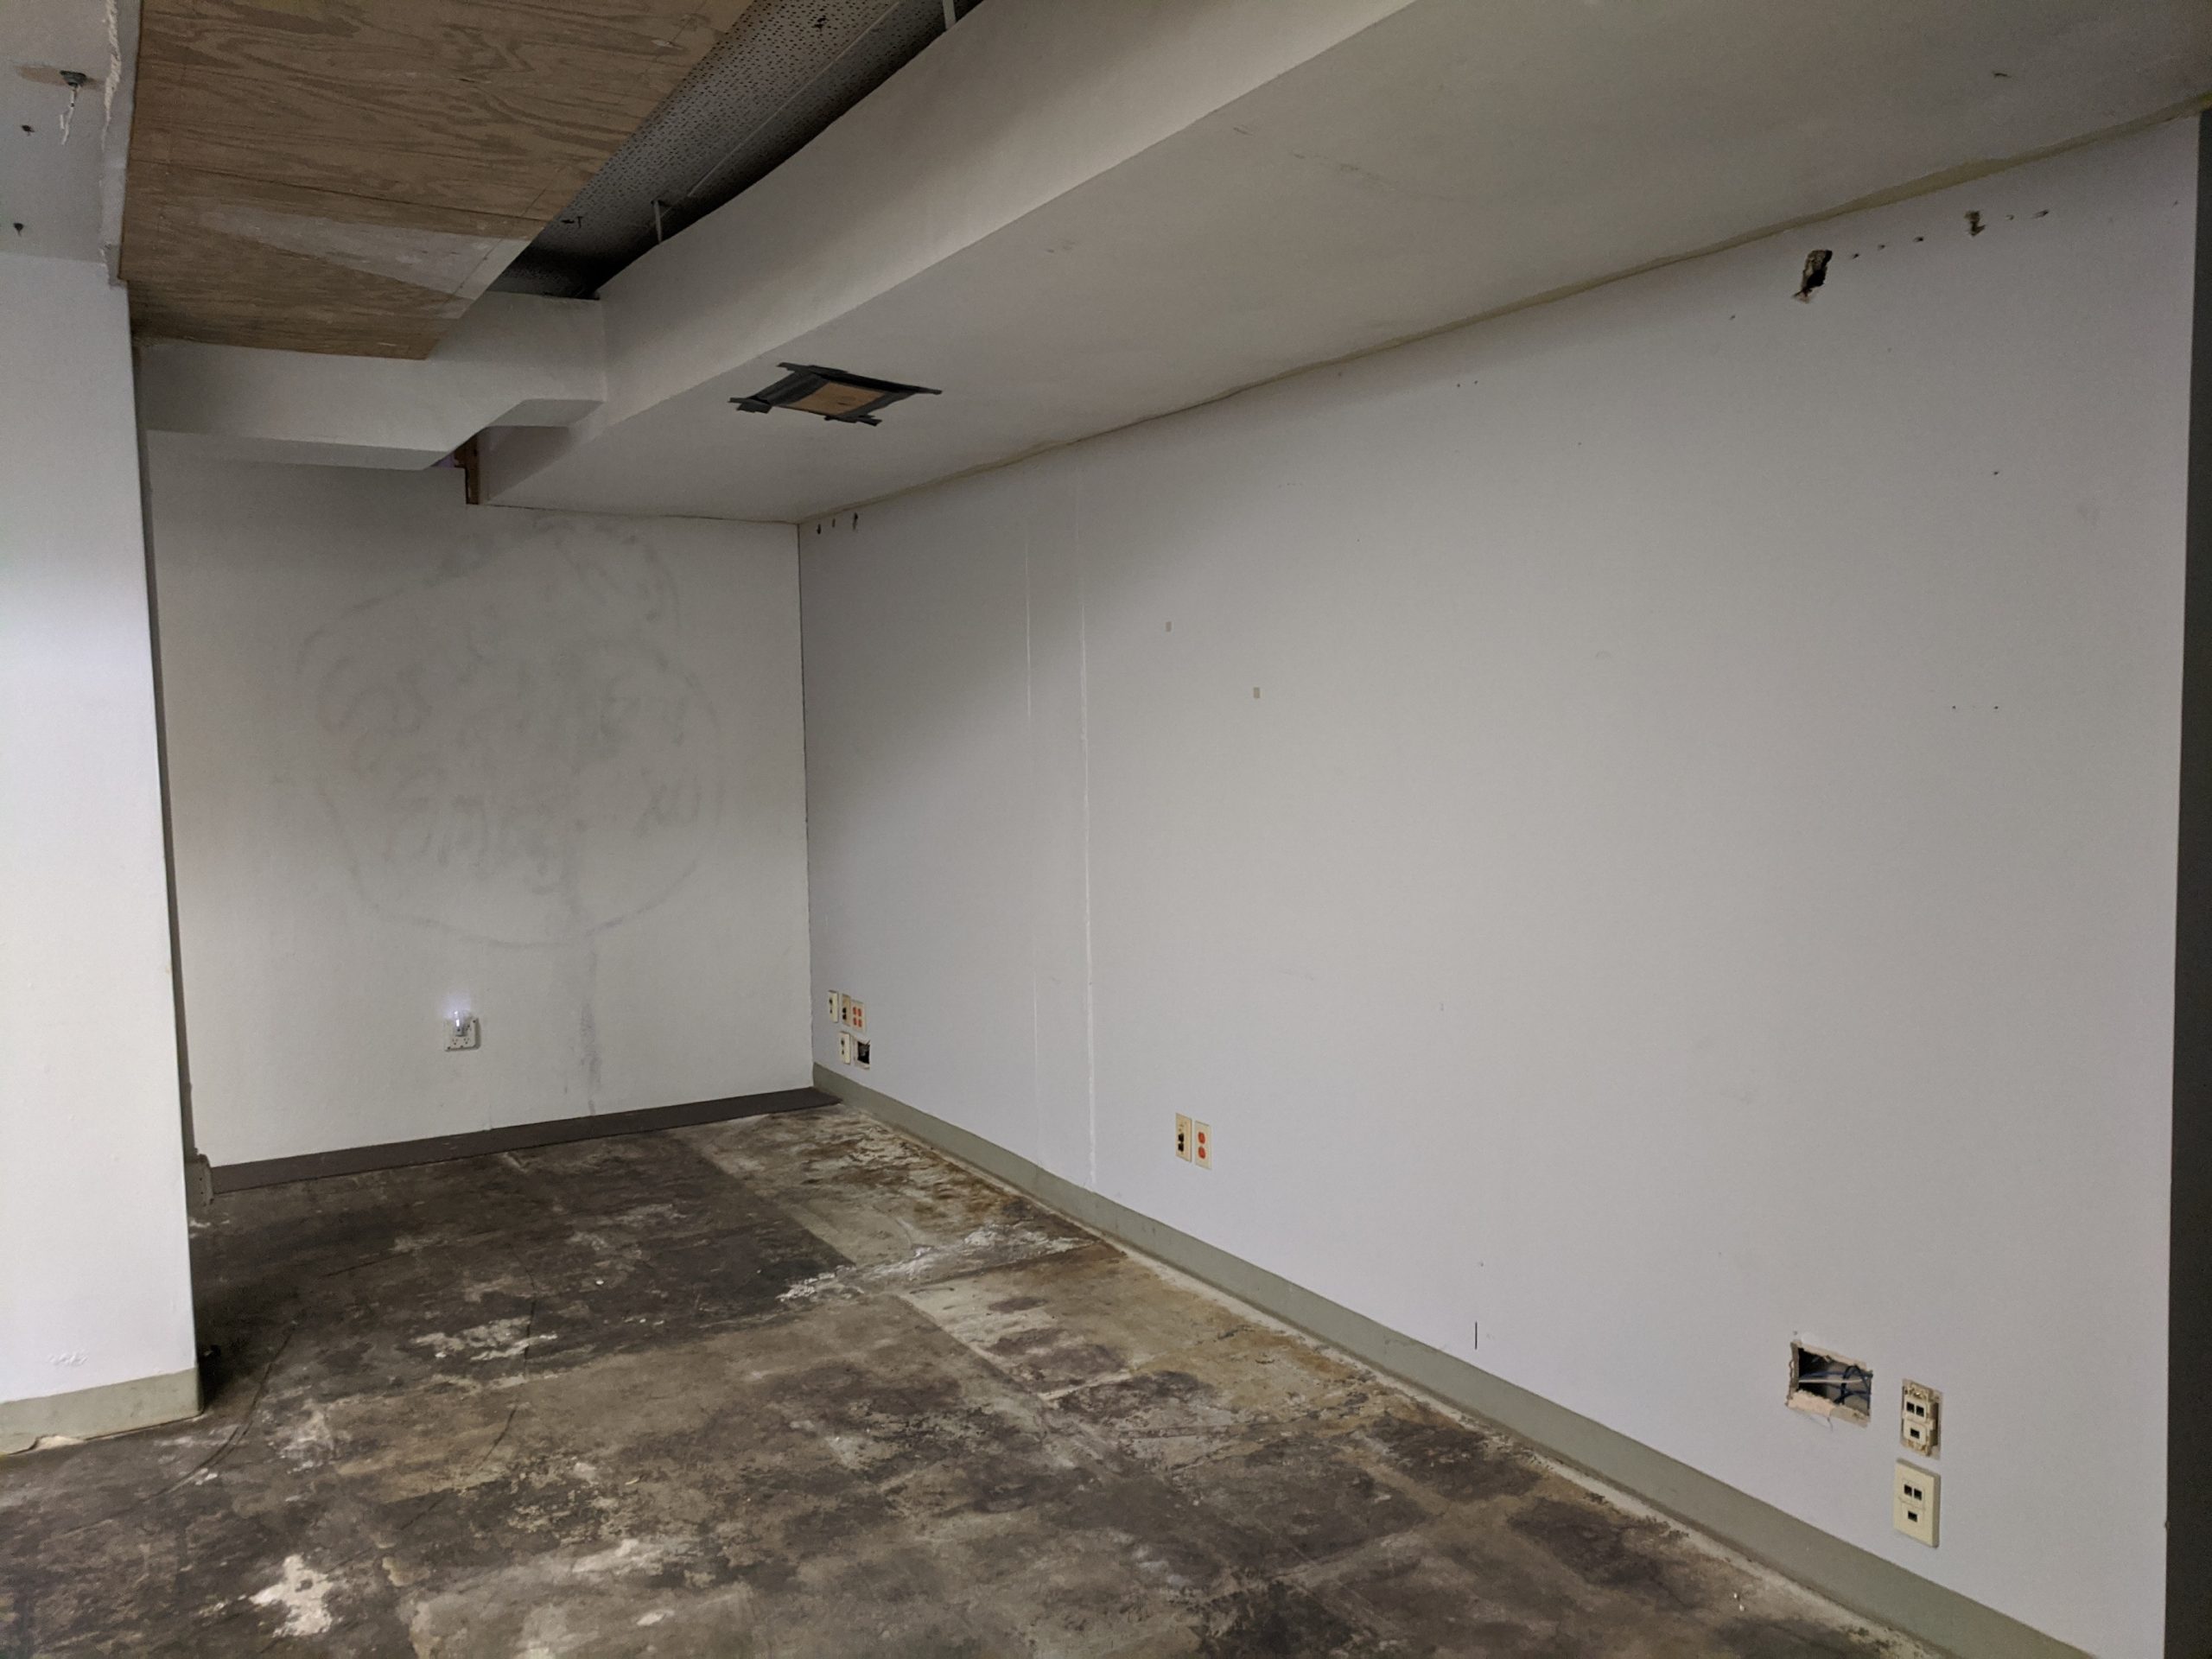
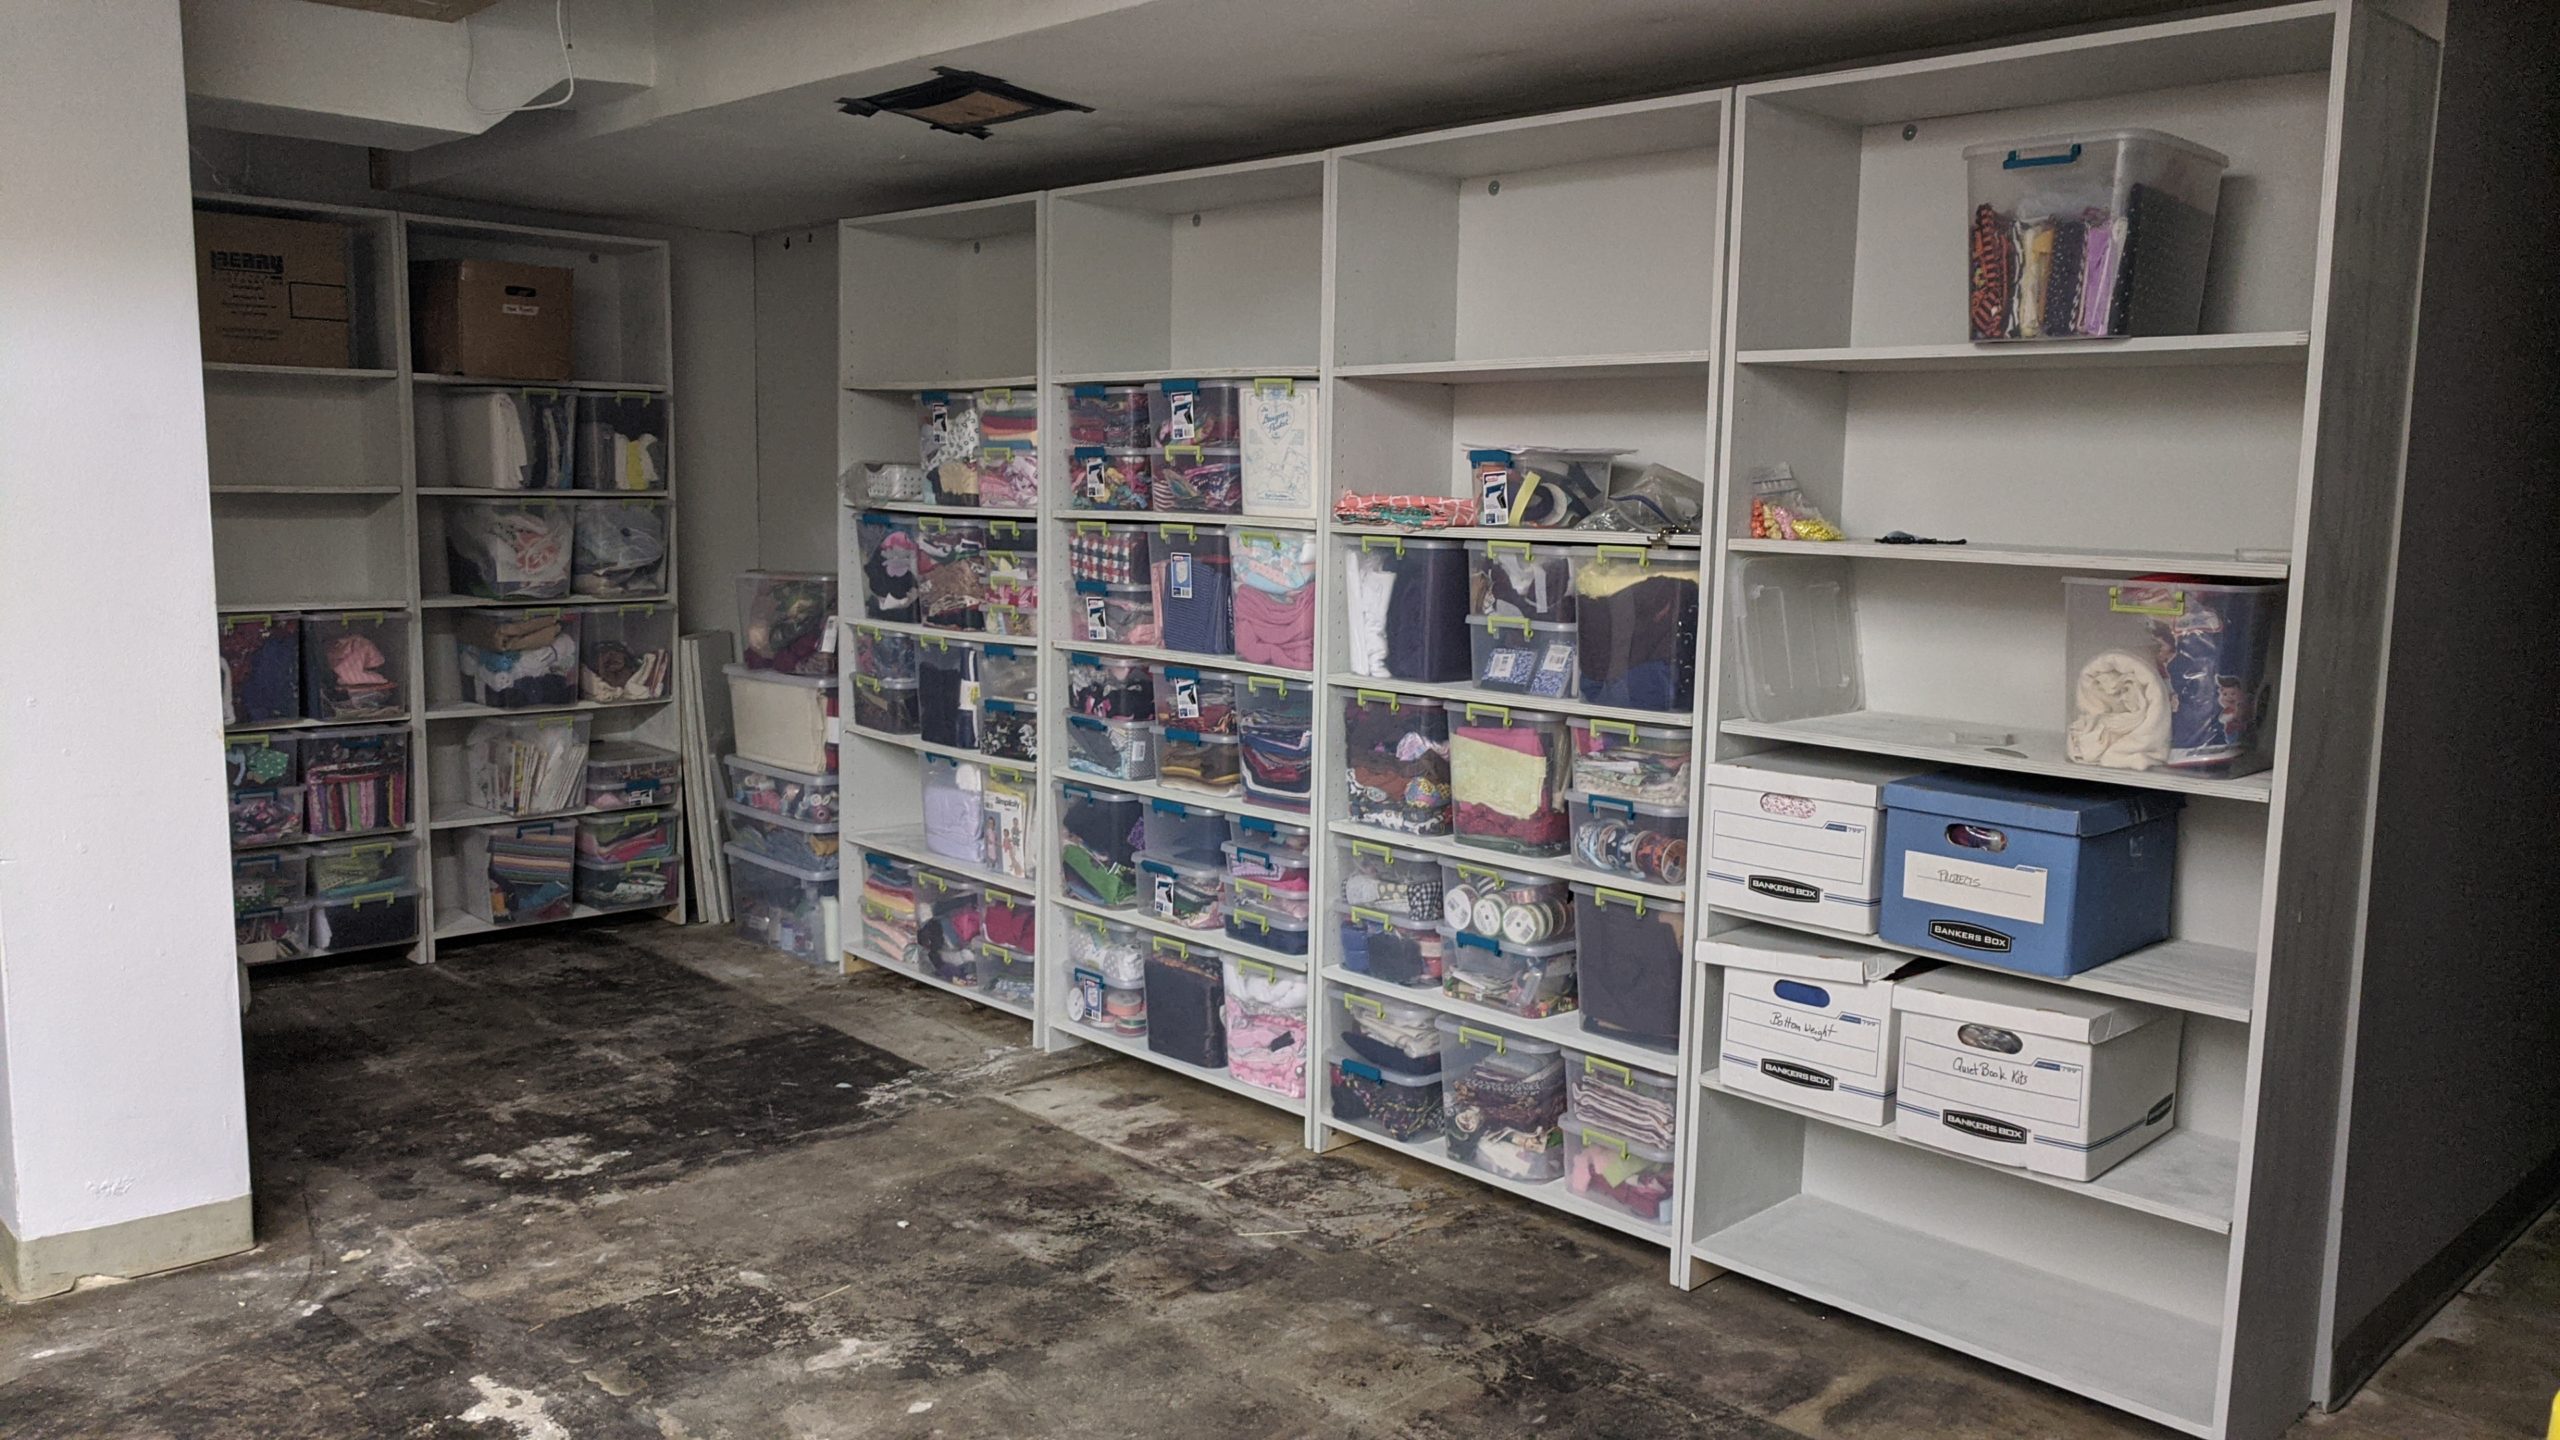
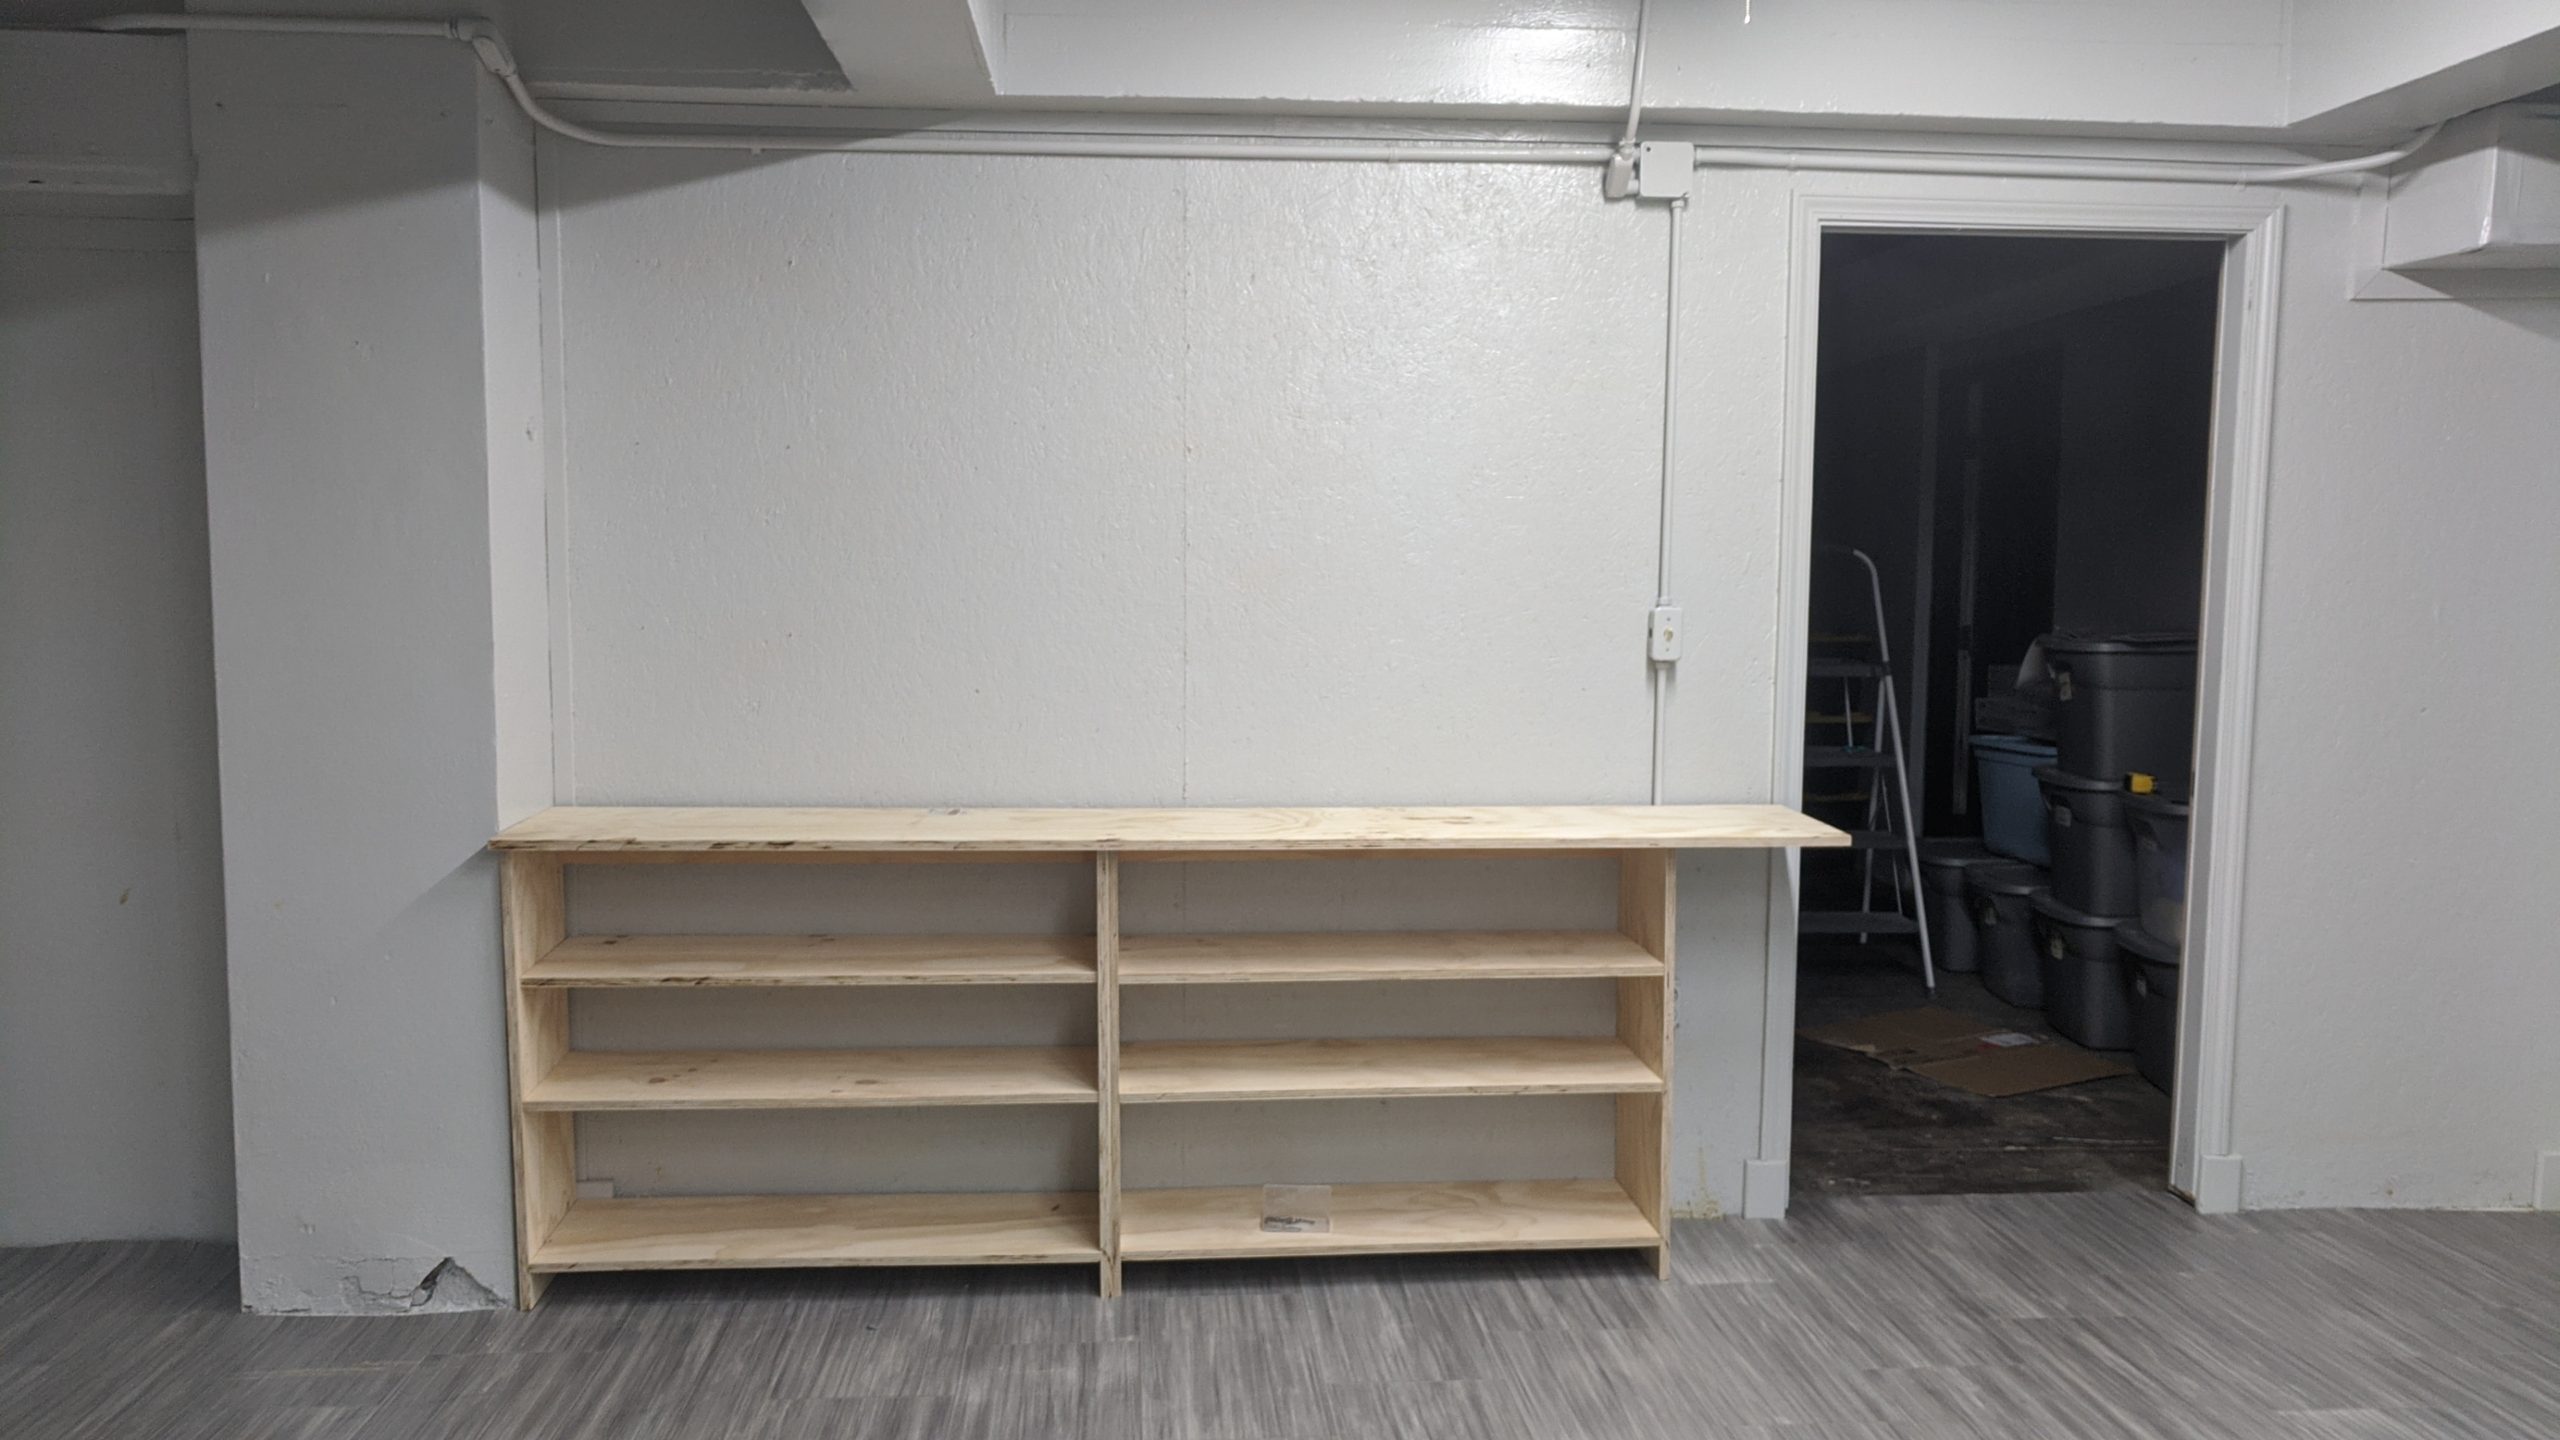
The first phase of the project is what we are calling the sewing room annex, or annex for short.  It shares a door with the sewing room.  I’d describe it as a sort of courtyard area outside the basement apartment and between the sewing room and shop. Combined, my wife and mother-in-law have so much sewing stuff like fabric, ribbon, thread, etc we knew that we’d need a lot of storage, so this space was perfect for that.  I built 8 shelving units, four that are 36 inches wide, 15 inches deep and 7 feet tall.  Another four that are the same height but 30 inches wide and 12 inches deep. Here’s the before, during and after.

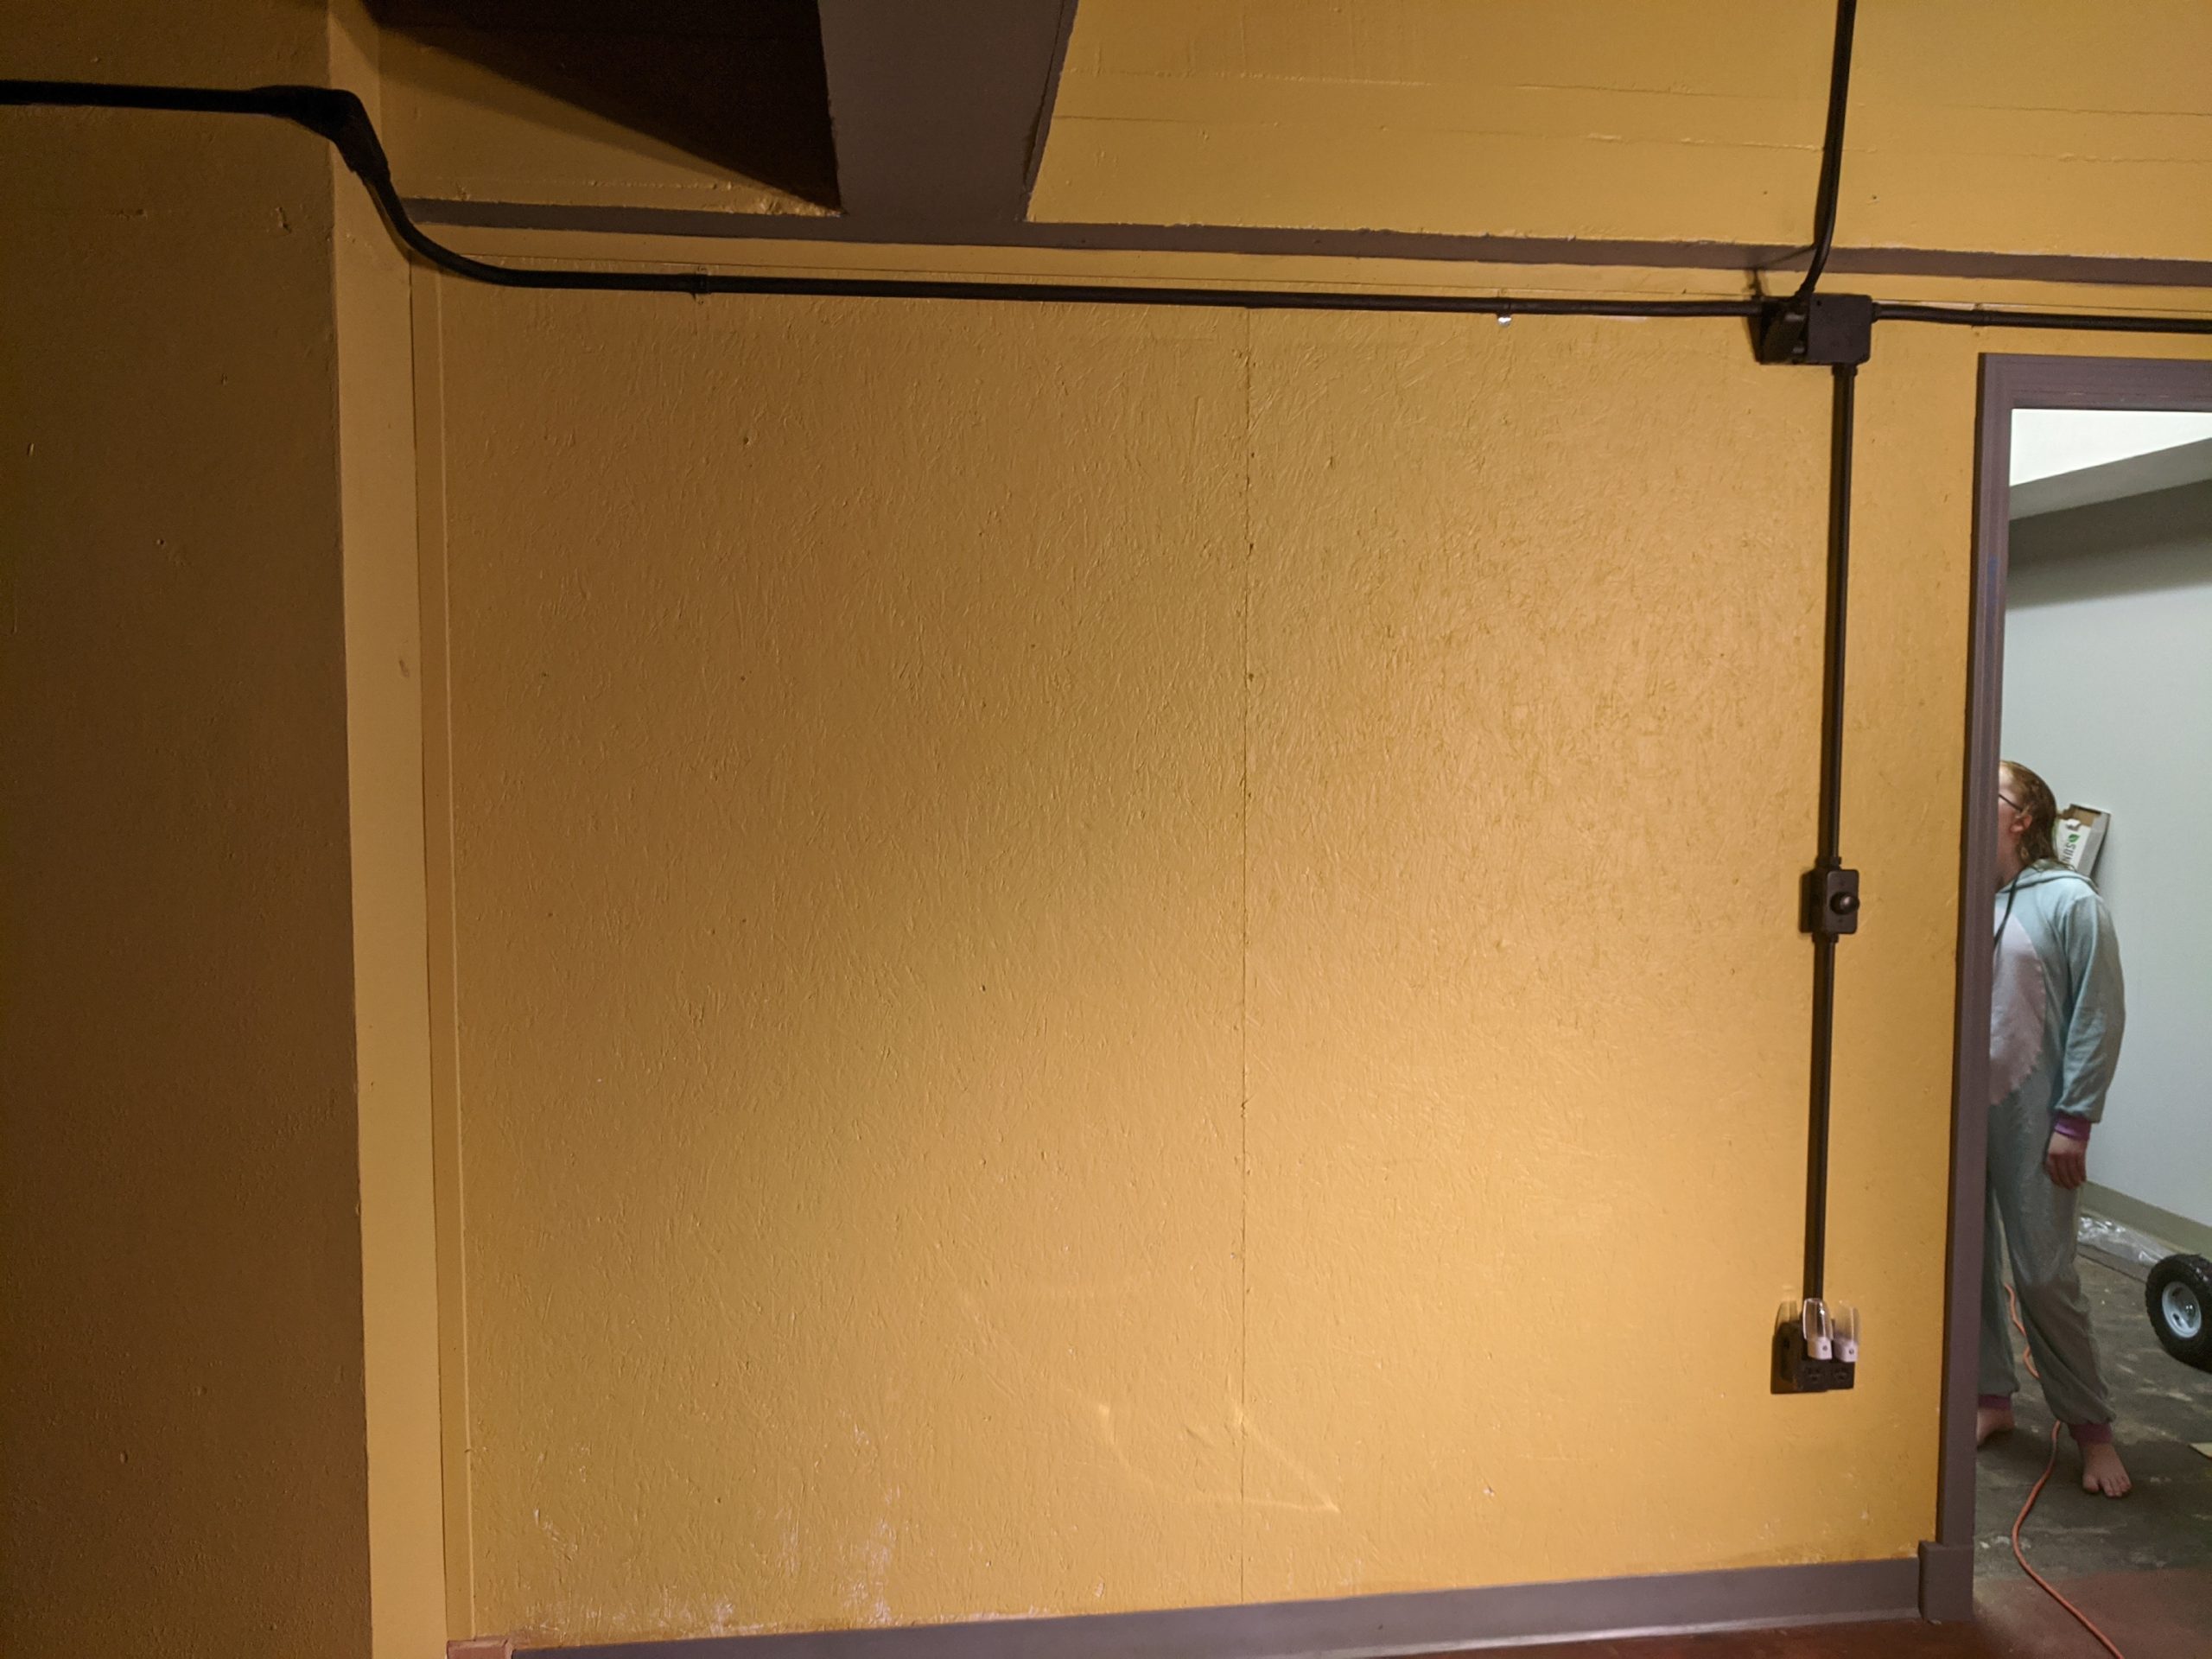
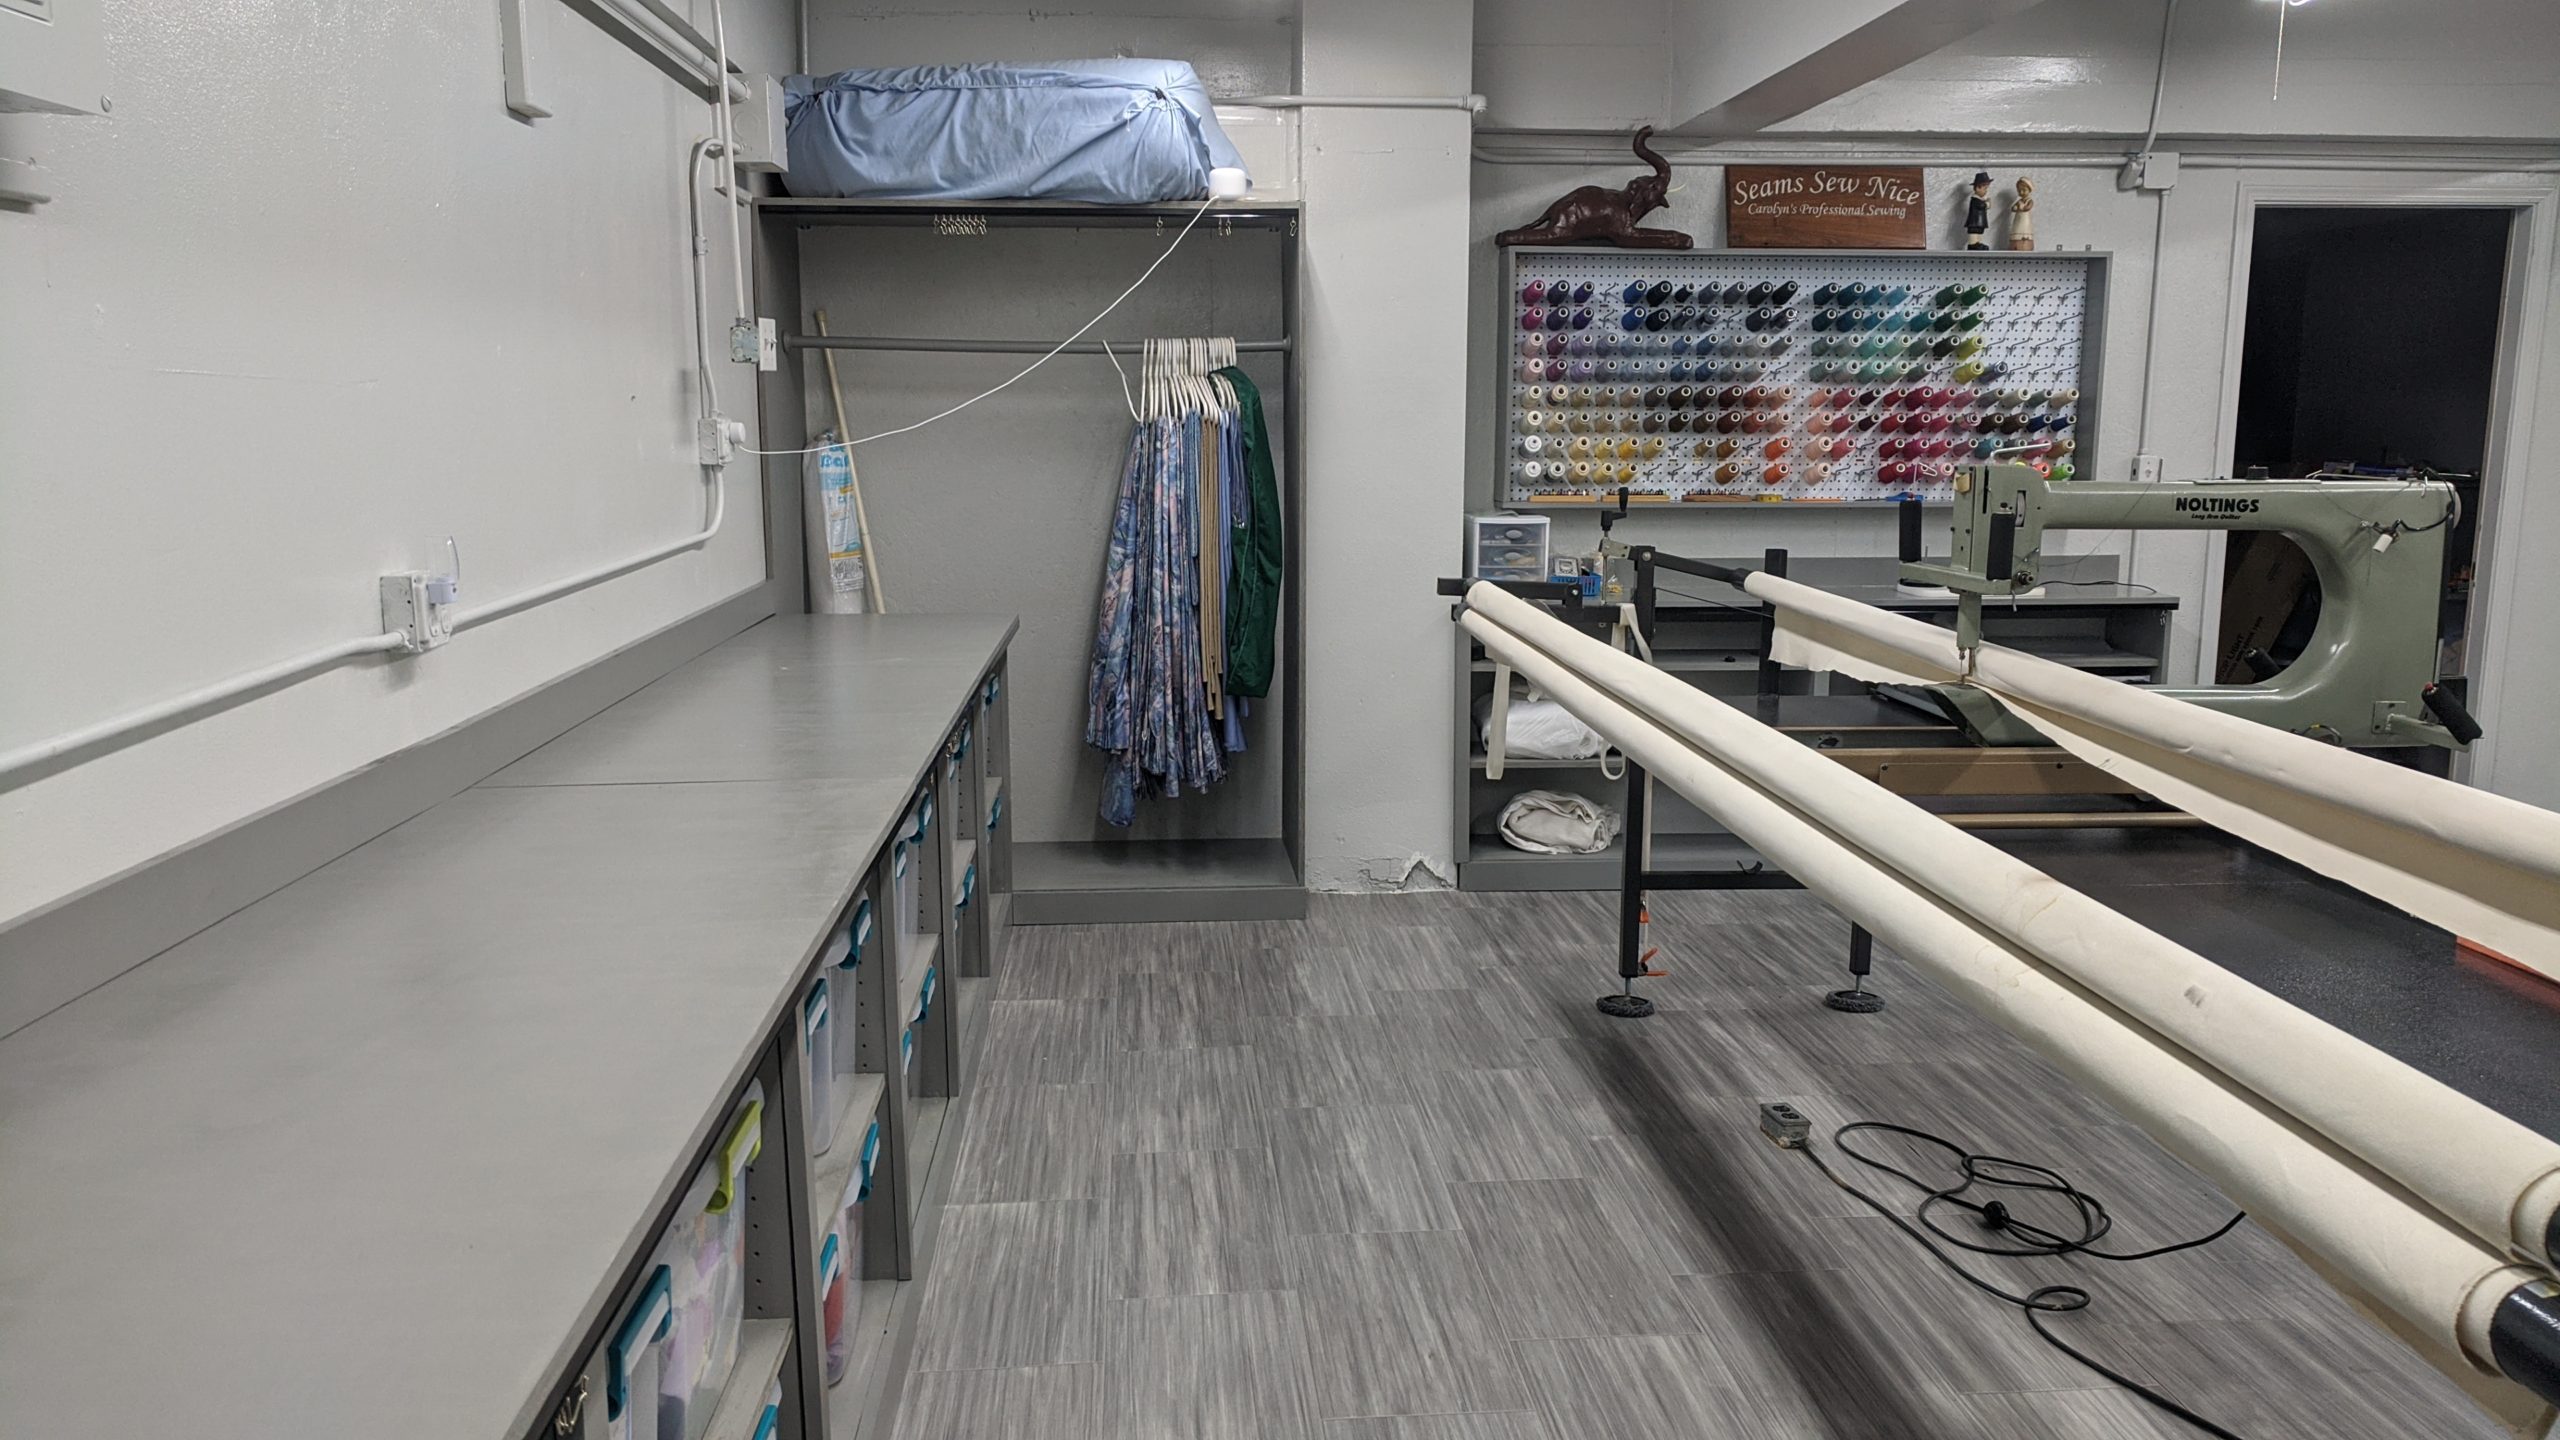
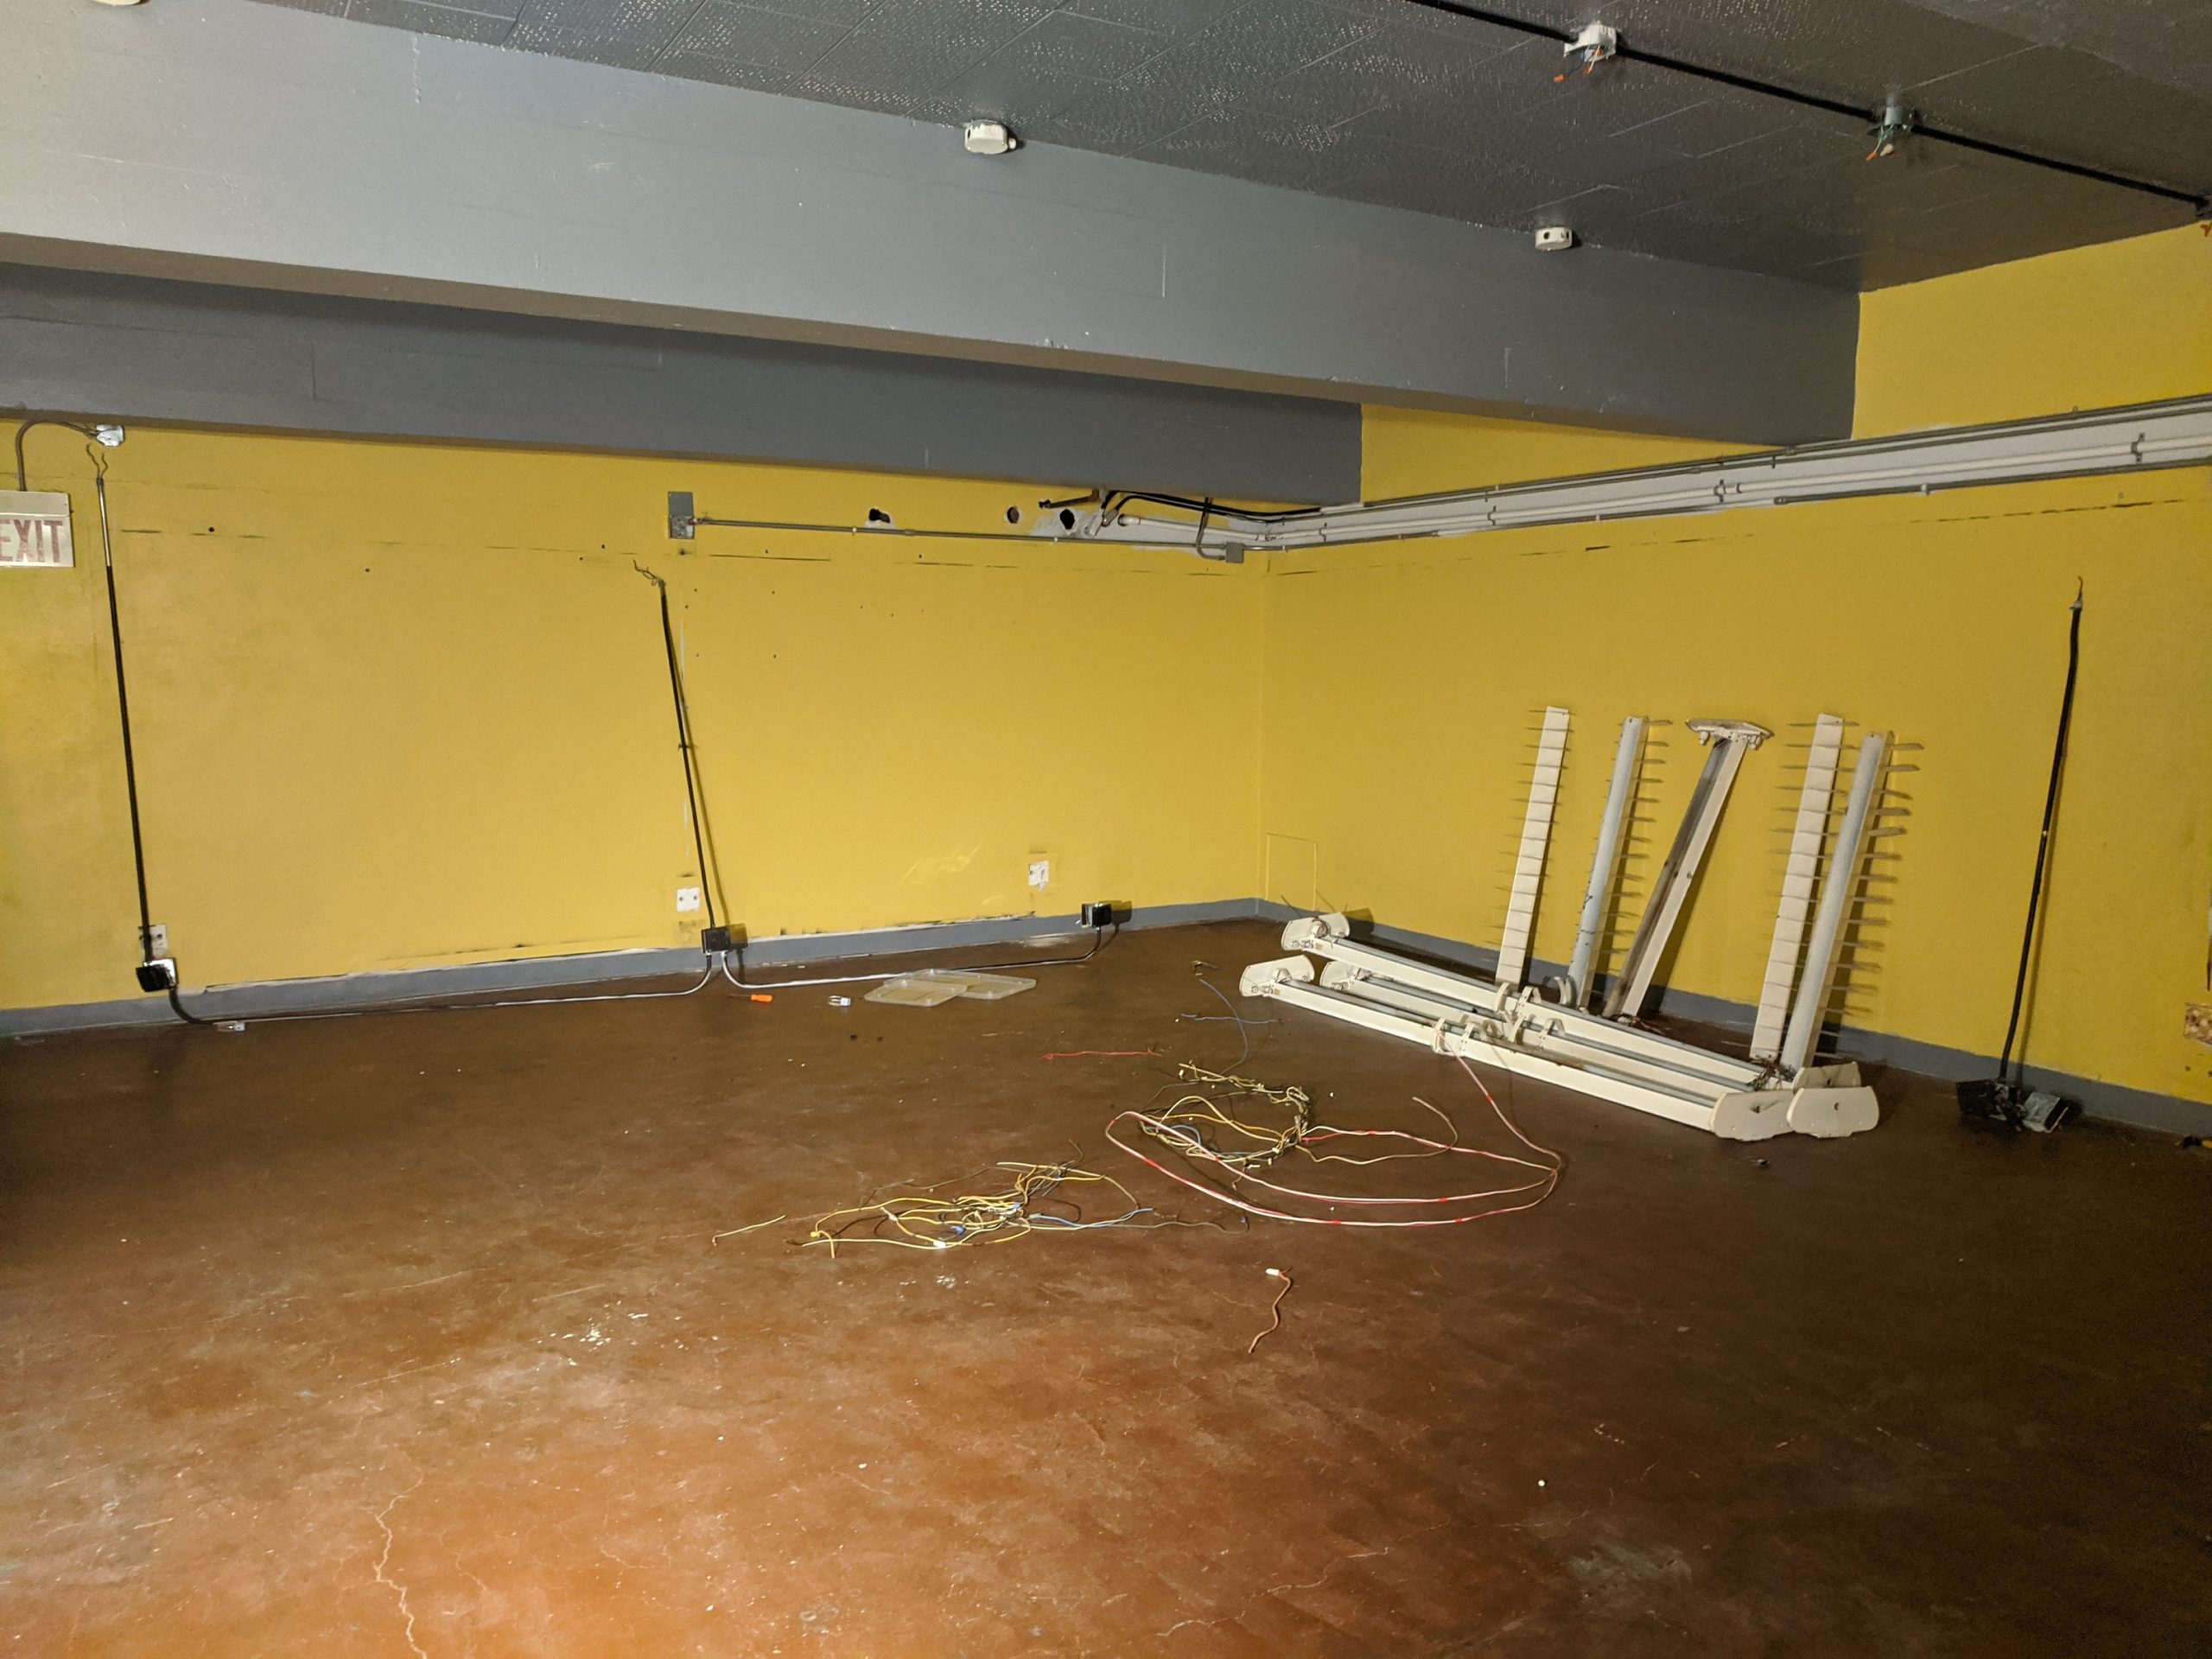
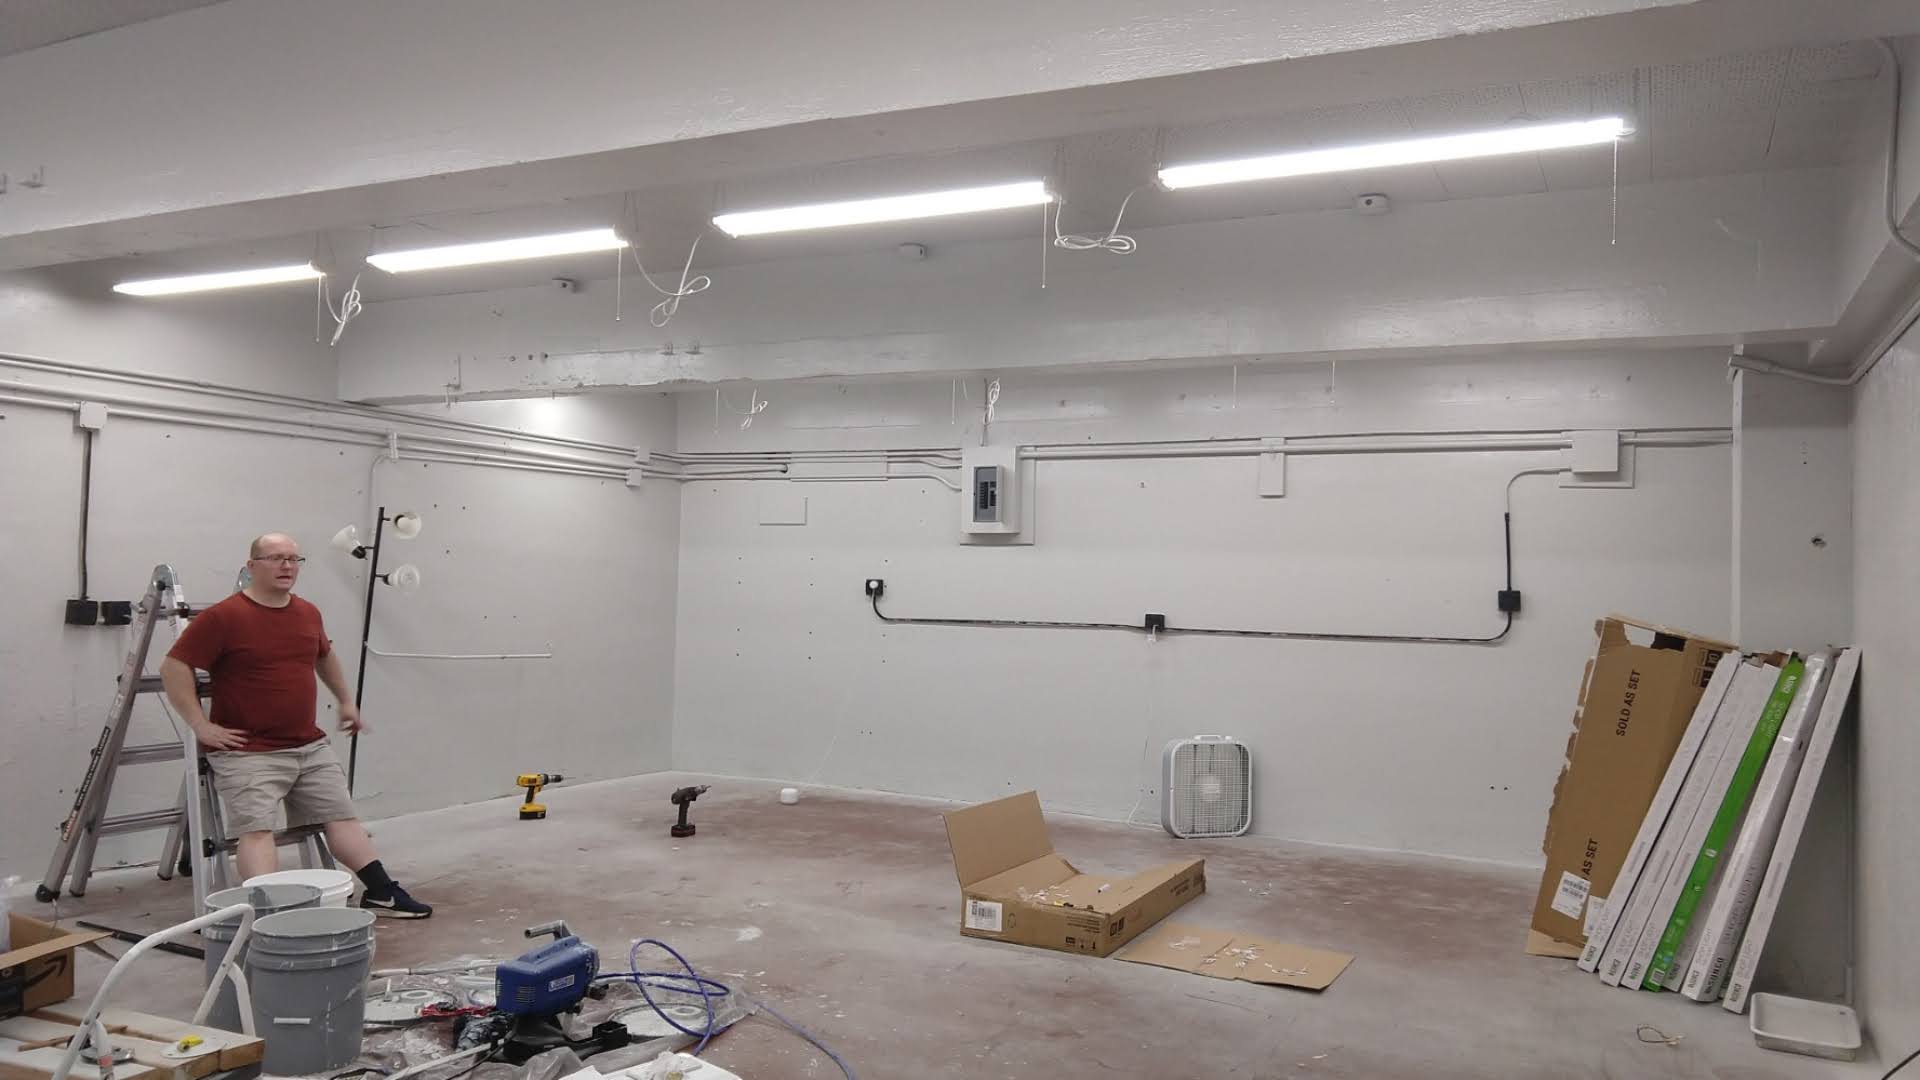
As I was working on that project I was thinking about next steps all the while.  Painting is one of my least favorite activities.  The sewing room is roughly 30 x 20’ so 600 square feet in all.  Including the ceiling and walls around 9 feet tall we had 1,500 square feet of surface to paint. I knew it had to be done though and to get it done in any sort of timely manner I’d have to use a paint sprayer.  Every time I read that manual and it stressed having to clean up real well so you don’t clog the hoses I kept getting intimidated. If you need a break with a roller or brush painting job, you can simply put it in a plastic bag and walk away. I was so worried I couldn’t do that with the sprayer.  Finally, I had to bite the bullet and just get it done.  So we got 10 gallons of the paint color we wanted and I got to work.  It took a good chunk of a day to paint all the surfaces.  It was tough but it was worth it in the end.  The room was leased to a brewery at one point and they had a medium yellow scheme.  After replacing with the very pale grey the room is so much brighter. You’ll notice a couple of things here.  First, I wasn’t thinking far enough ahead and didn’t get any before pictures of the room before I had already torn down the old lighting fixtures. Which leads me to the electrical changes.  I had to move the receptacles up to above the height of the countertops. That stretched me mentally to figure out that electrical piece. And as you know from earlier posts, I’m changing all my fixtures to be LED.  After researching 8ft fluorescent LED replacements I decided it’d just be better to get new fixtures entirely.

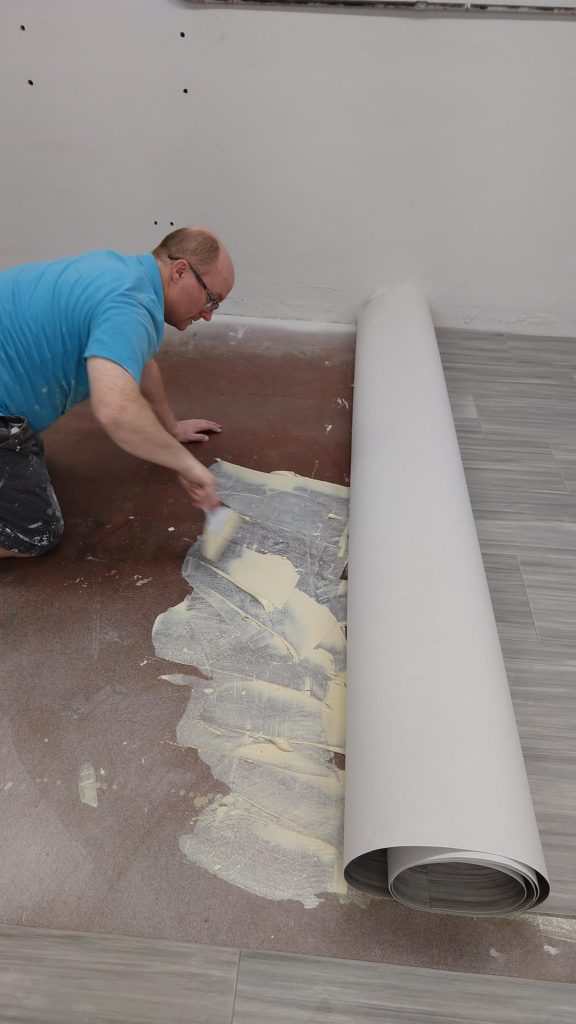
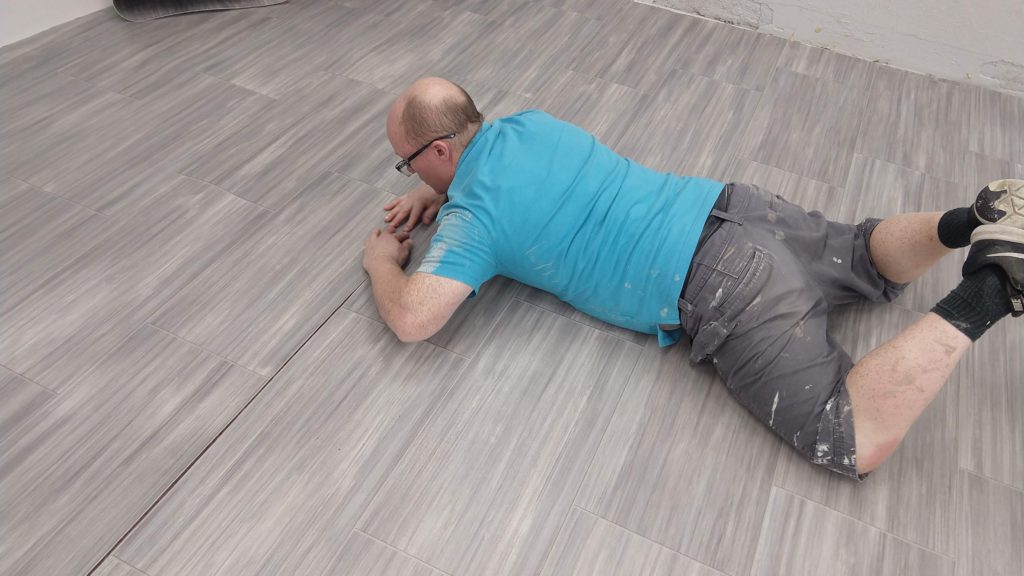
We were trying to figure out the flooring for a while. We looked into epoxy coatings, simply painting, laminate tiles and other solutions.  At some point my father-in-law saw a deal we couldn’t pass up. At the Habitat for Humanity ReStore he found vinyl flooring for an amazing $0.10 per sq foot.  Yes, you read that right, ten cents per square foot.  The caveat was that you had to buy an entire roll which varied from 1500-3500 sq feet. After lots of looking we found a pattern and color we liked. My father-in-law arranged for picking it up with his trailer.  While I was working on building cabinets, he and my oldest son built a rack that we could unroll it from.  We settled on a roll about 2,700 square feet so we have plenty to do the sewing room, annex eventually and any other floors we may want to do in the basement. The sticker on the roll from the manufacturer said it weighed nearly 900 lbs.  They put it on my father-in-law’s trailer with a forklift, we just used rolling hand trucks and shimmying to maneuver it off the trailer.

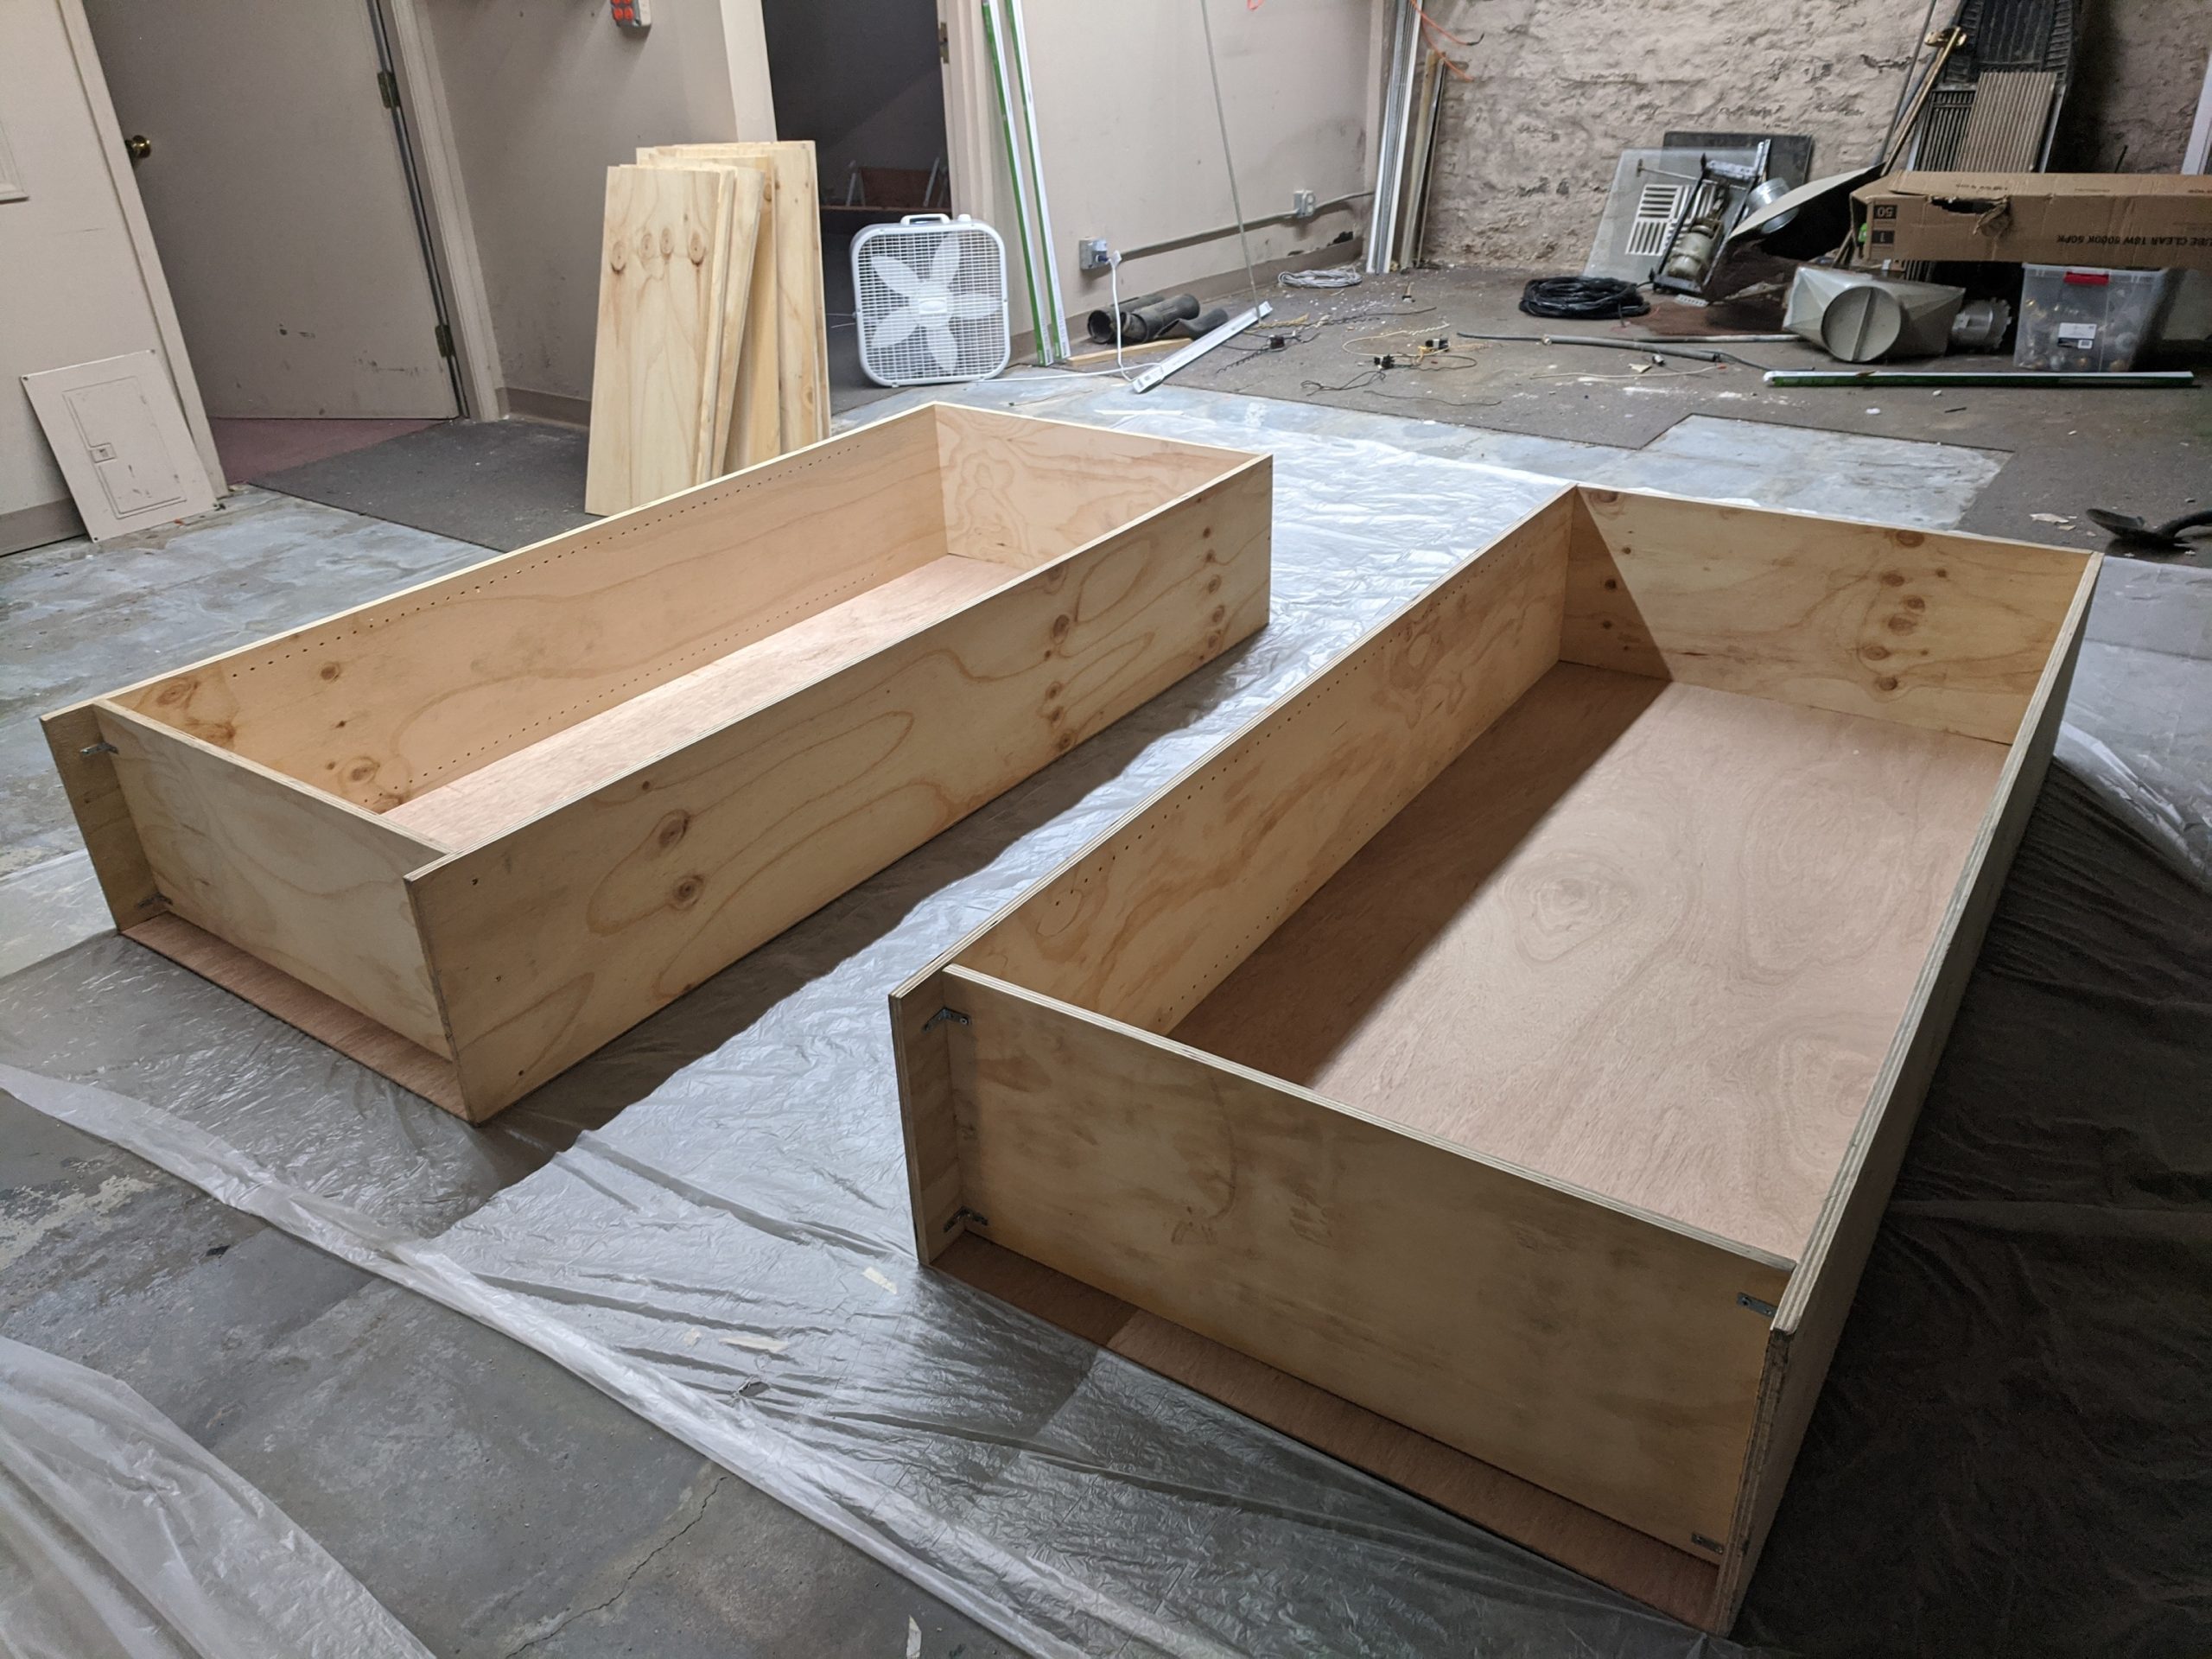
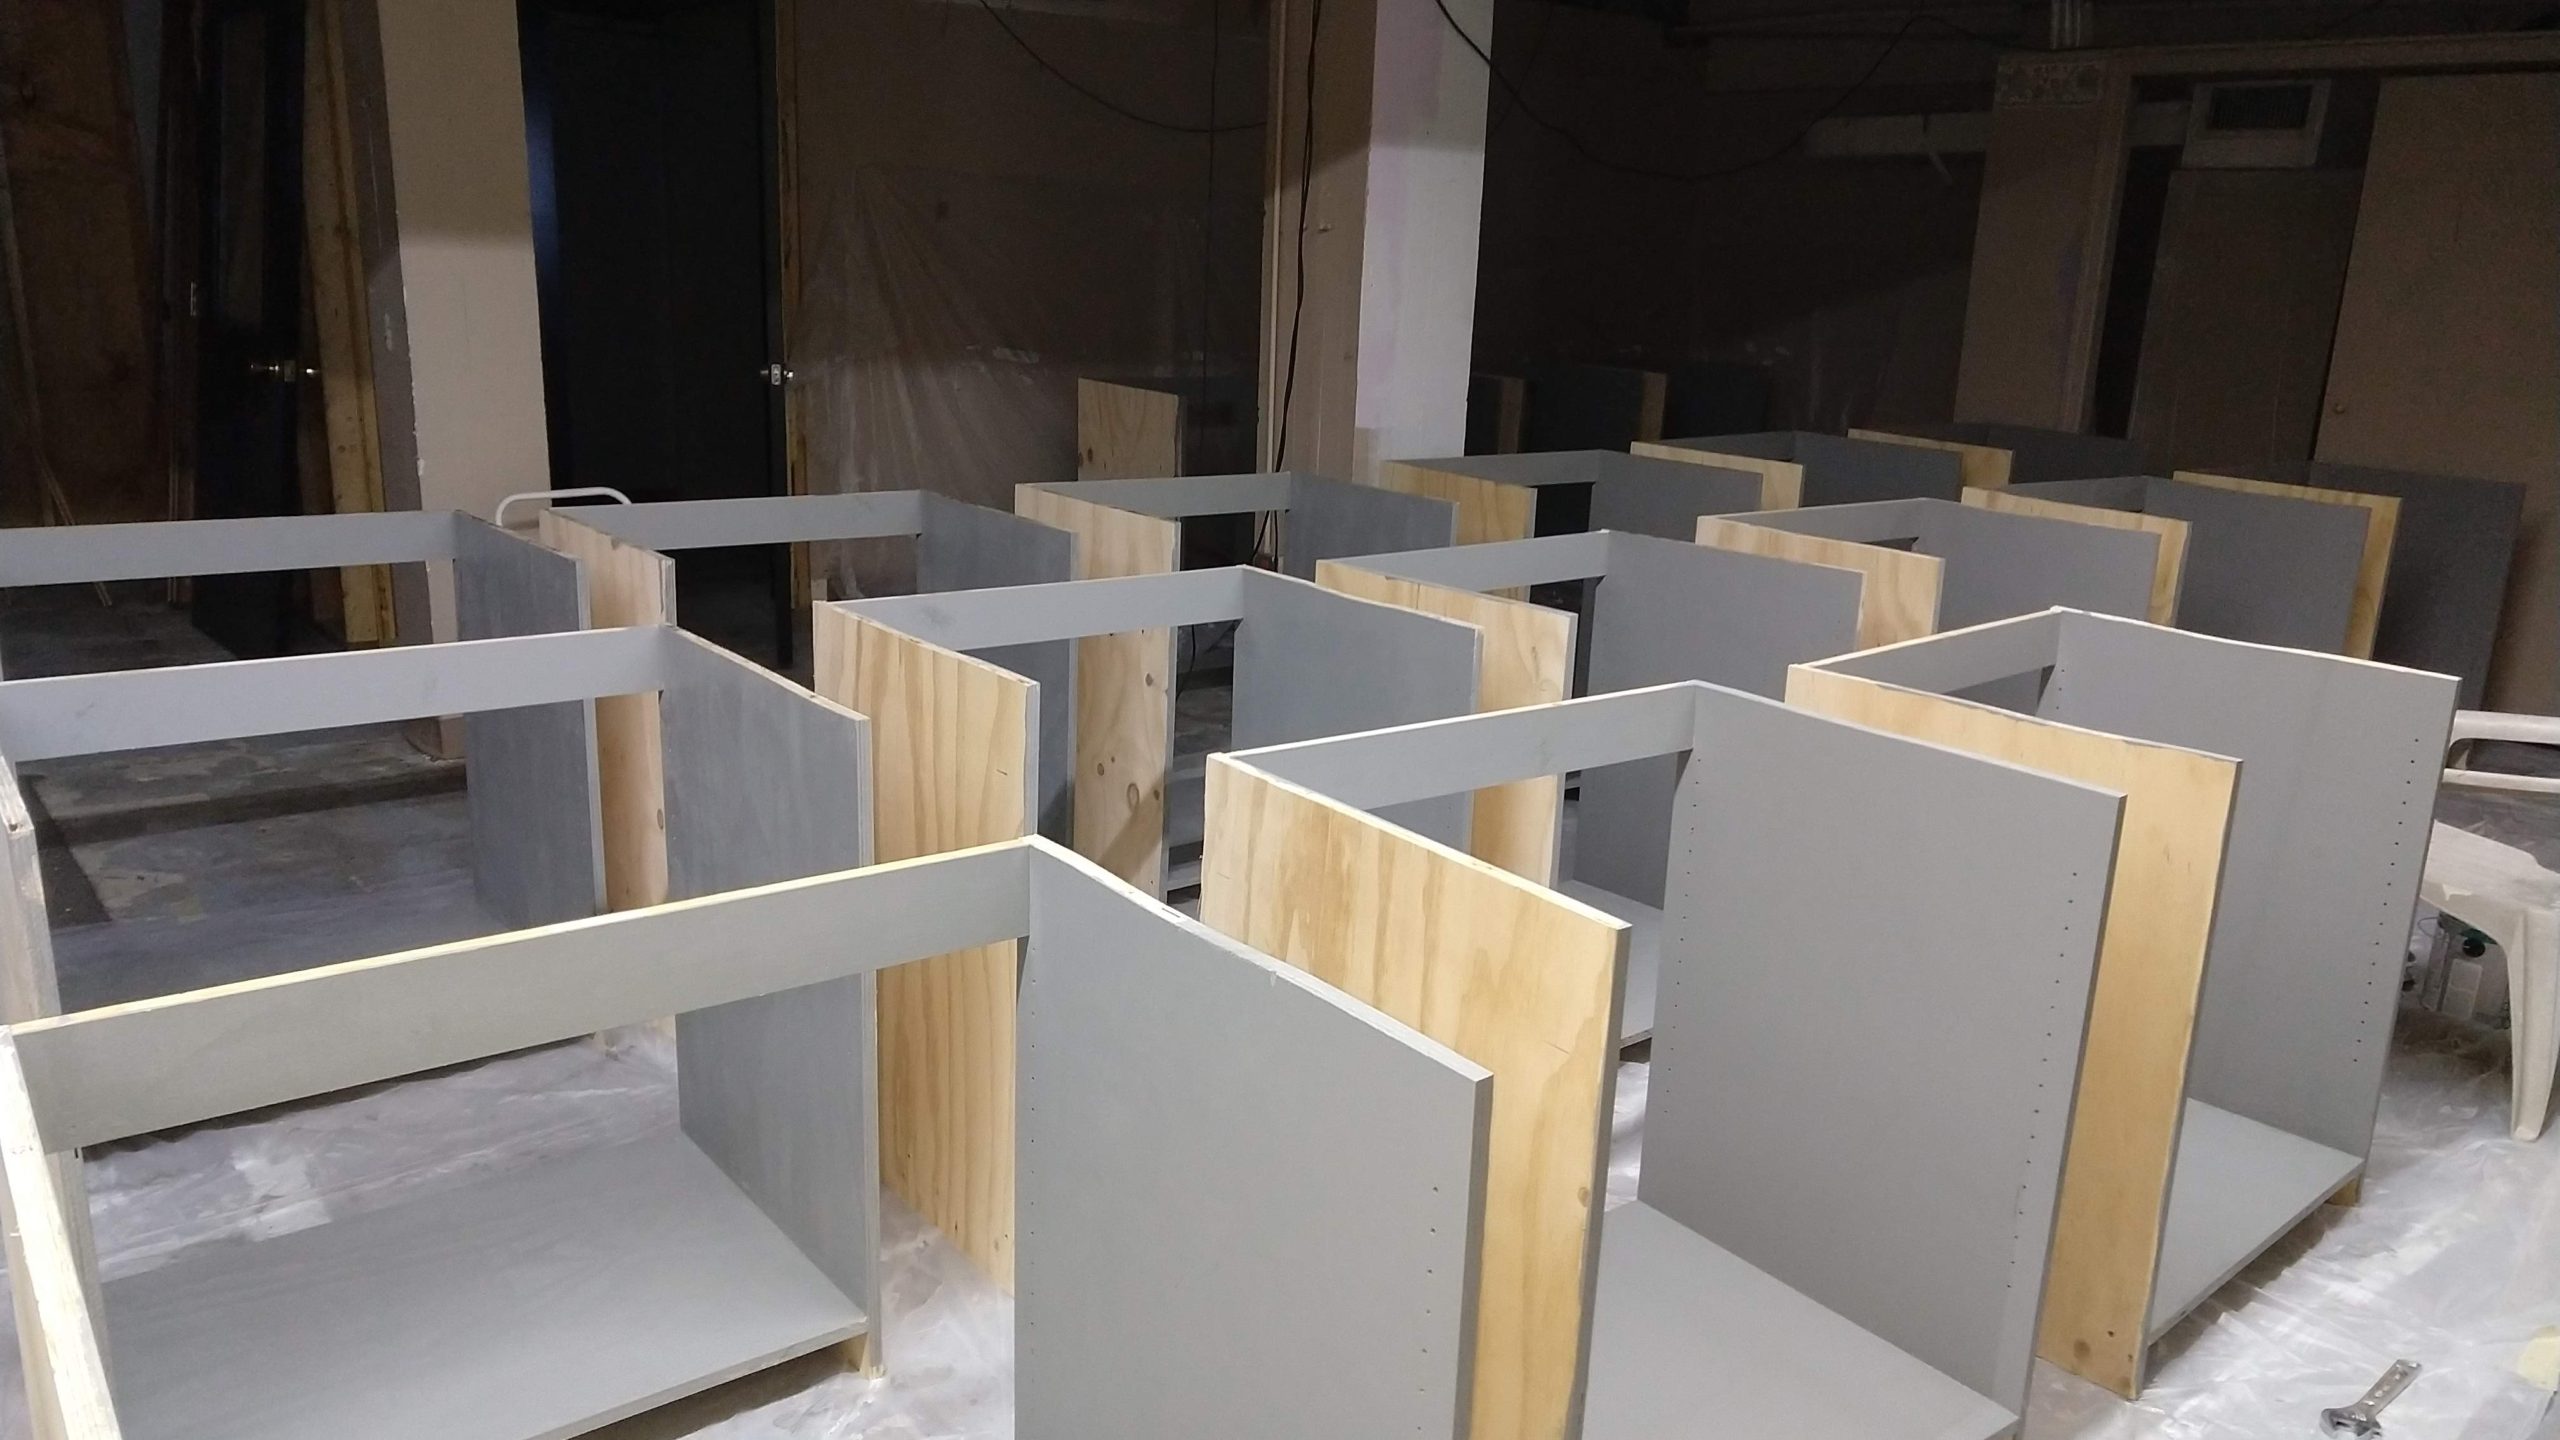
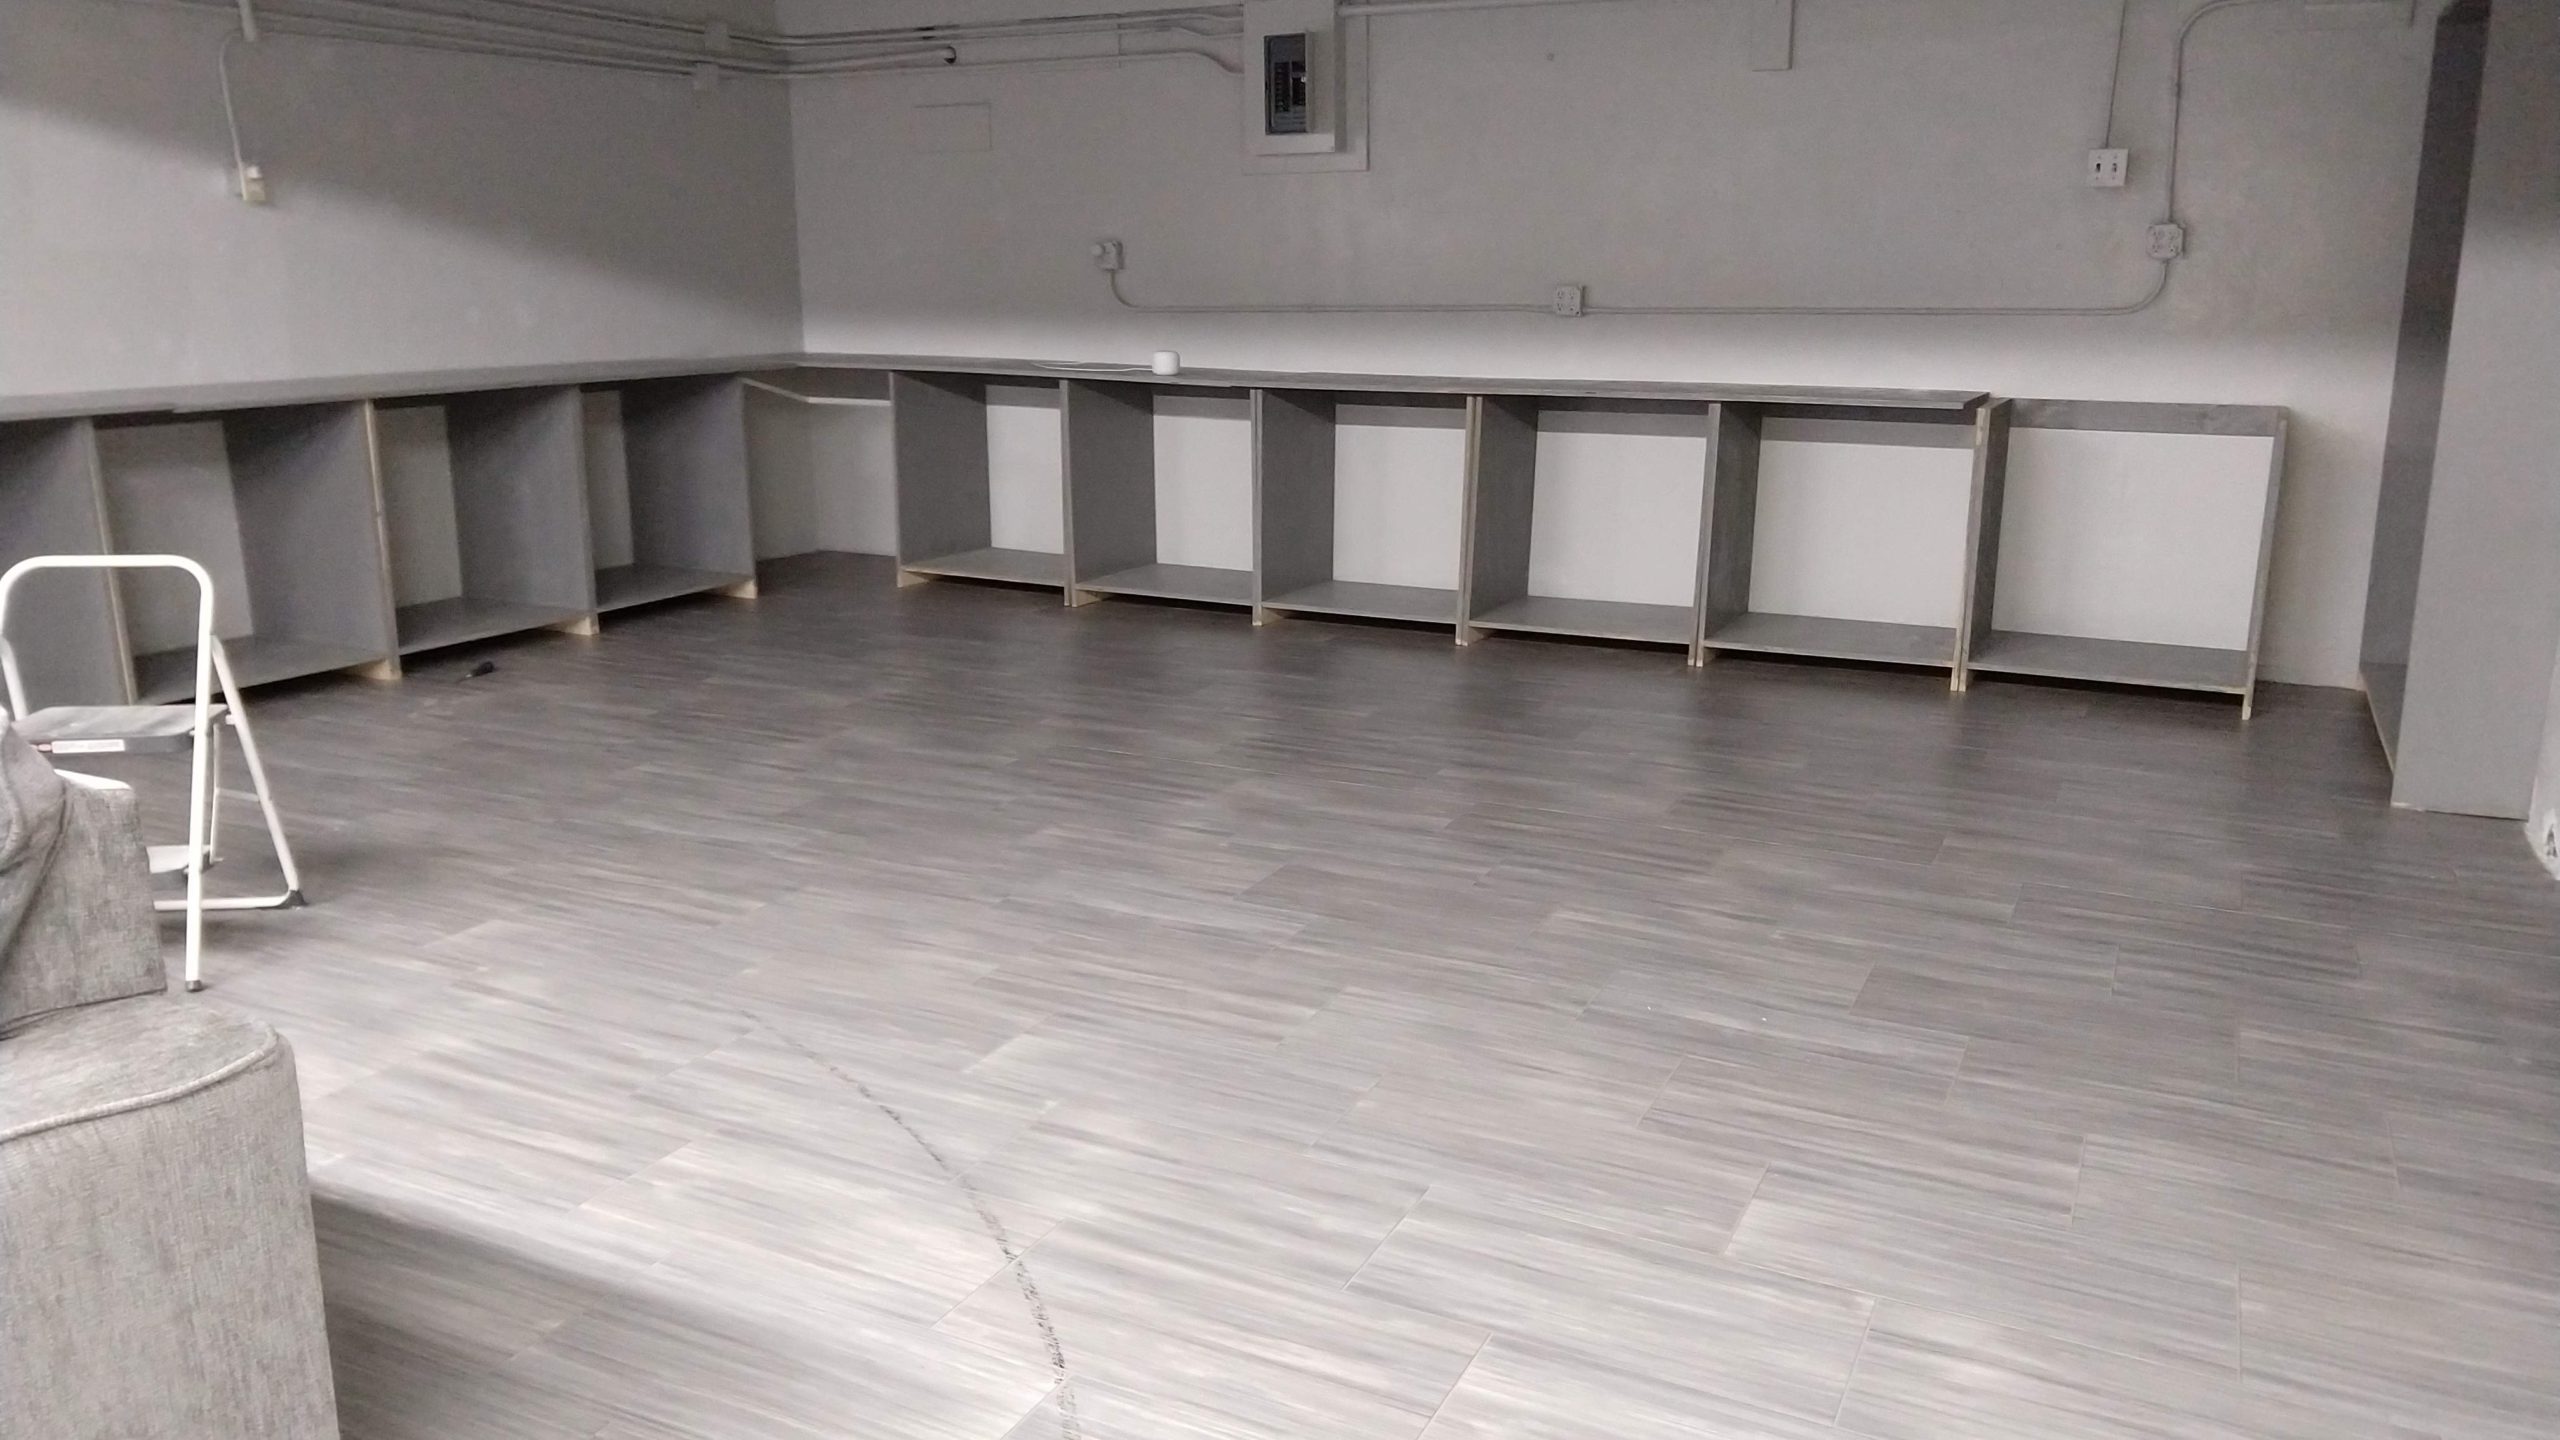
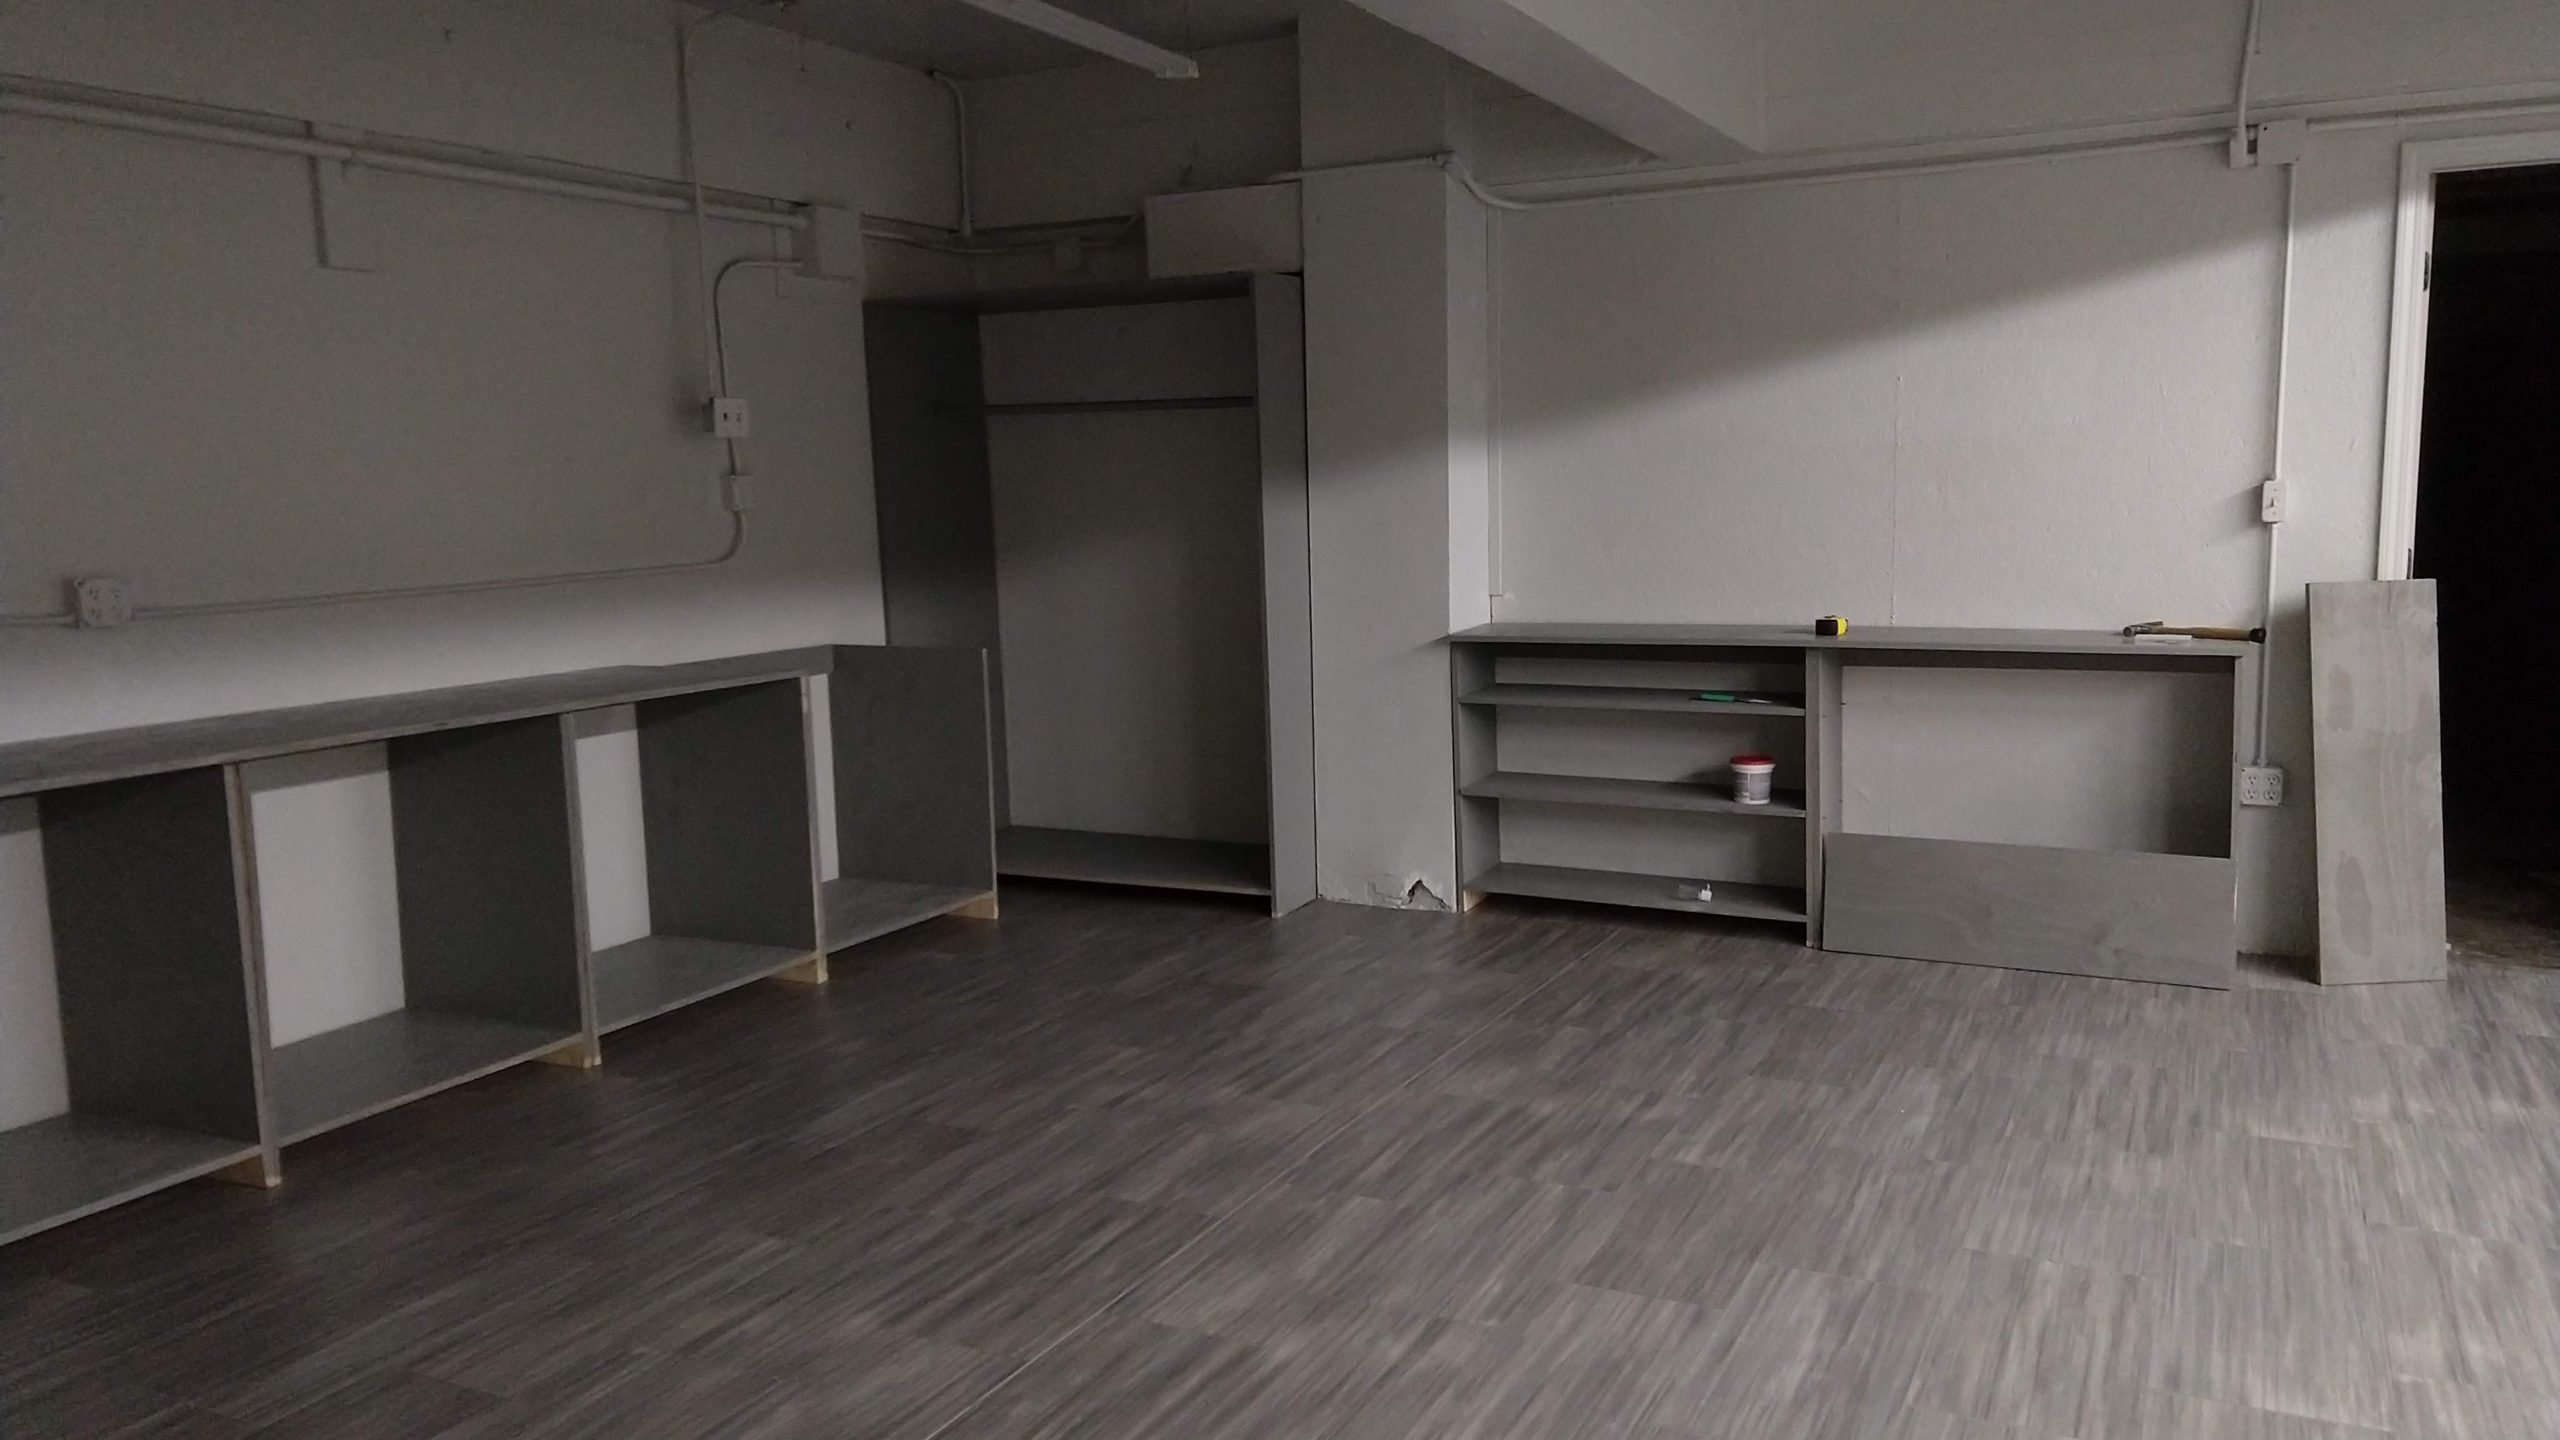
After painting and flooring I got busy working on the cabinets.  After many rounds of back and forth with various widths and depths for the cabinet units we decided on 30” wide cabinets that are 24” deep. As you’ll see in later before and after pictures that was exactly what we wanted to be able to hold some of my wife’s storage tubs at 2 tubs wide that are also 24” deep. And those have smaller counterparts that piece together to the same dimensions so that the cabinet fits her various combinations of tubs perfectly.  With the size settled upon we measured, and we could fit 19 of those units along the three walls. One wall with 5, another with 8 and the last wall with 6. Then we settled on the size of the unit we call the closet for hanging finished quilts and the shelf for under the thread rack. So now I was ready to get started on building those units.  First step was a trip for lumber.  We asked my father-in-law to take us with his pickup truck and he obliged.  That was extremely helpful because we got a ton of wood.  Literally, a ton of wood. We needed 28 sheets of 3/4” plywood for all the sewing room pieces. Doing a quick internet search I found out those are about 68 lbs each so 1,904 lbs there.  And we had 3 dozen or so 1x4s for trim pieces so over all it was more than 2,000 lbs of wood.  That was hard to unload all the way to the basement.  Shout out to my oldest son, Michael, for being a trooper on that one. The units came together well after I made some mistakes in bracing the wood to cut them and some came out uneven.  It wasn’t so bad that they didn’t piece together well enough though. Shout out to my younger two boys, Theodore and Lawrence for drilling all the shelf pin holes with a jig I taught them to use. And to my oldest daughter, Vivian, and Michael, for the tremendous amount of painting they did. That definitely stretched them to do more than they thought they could.

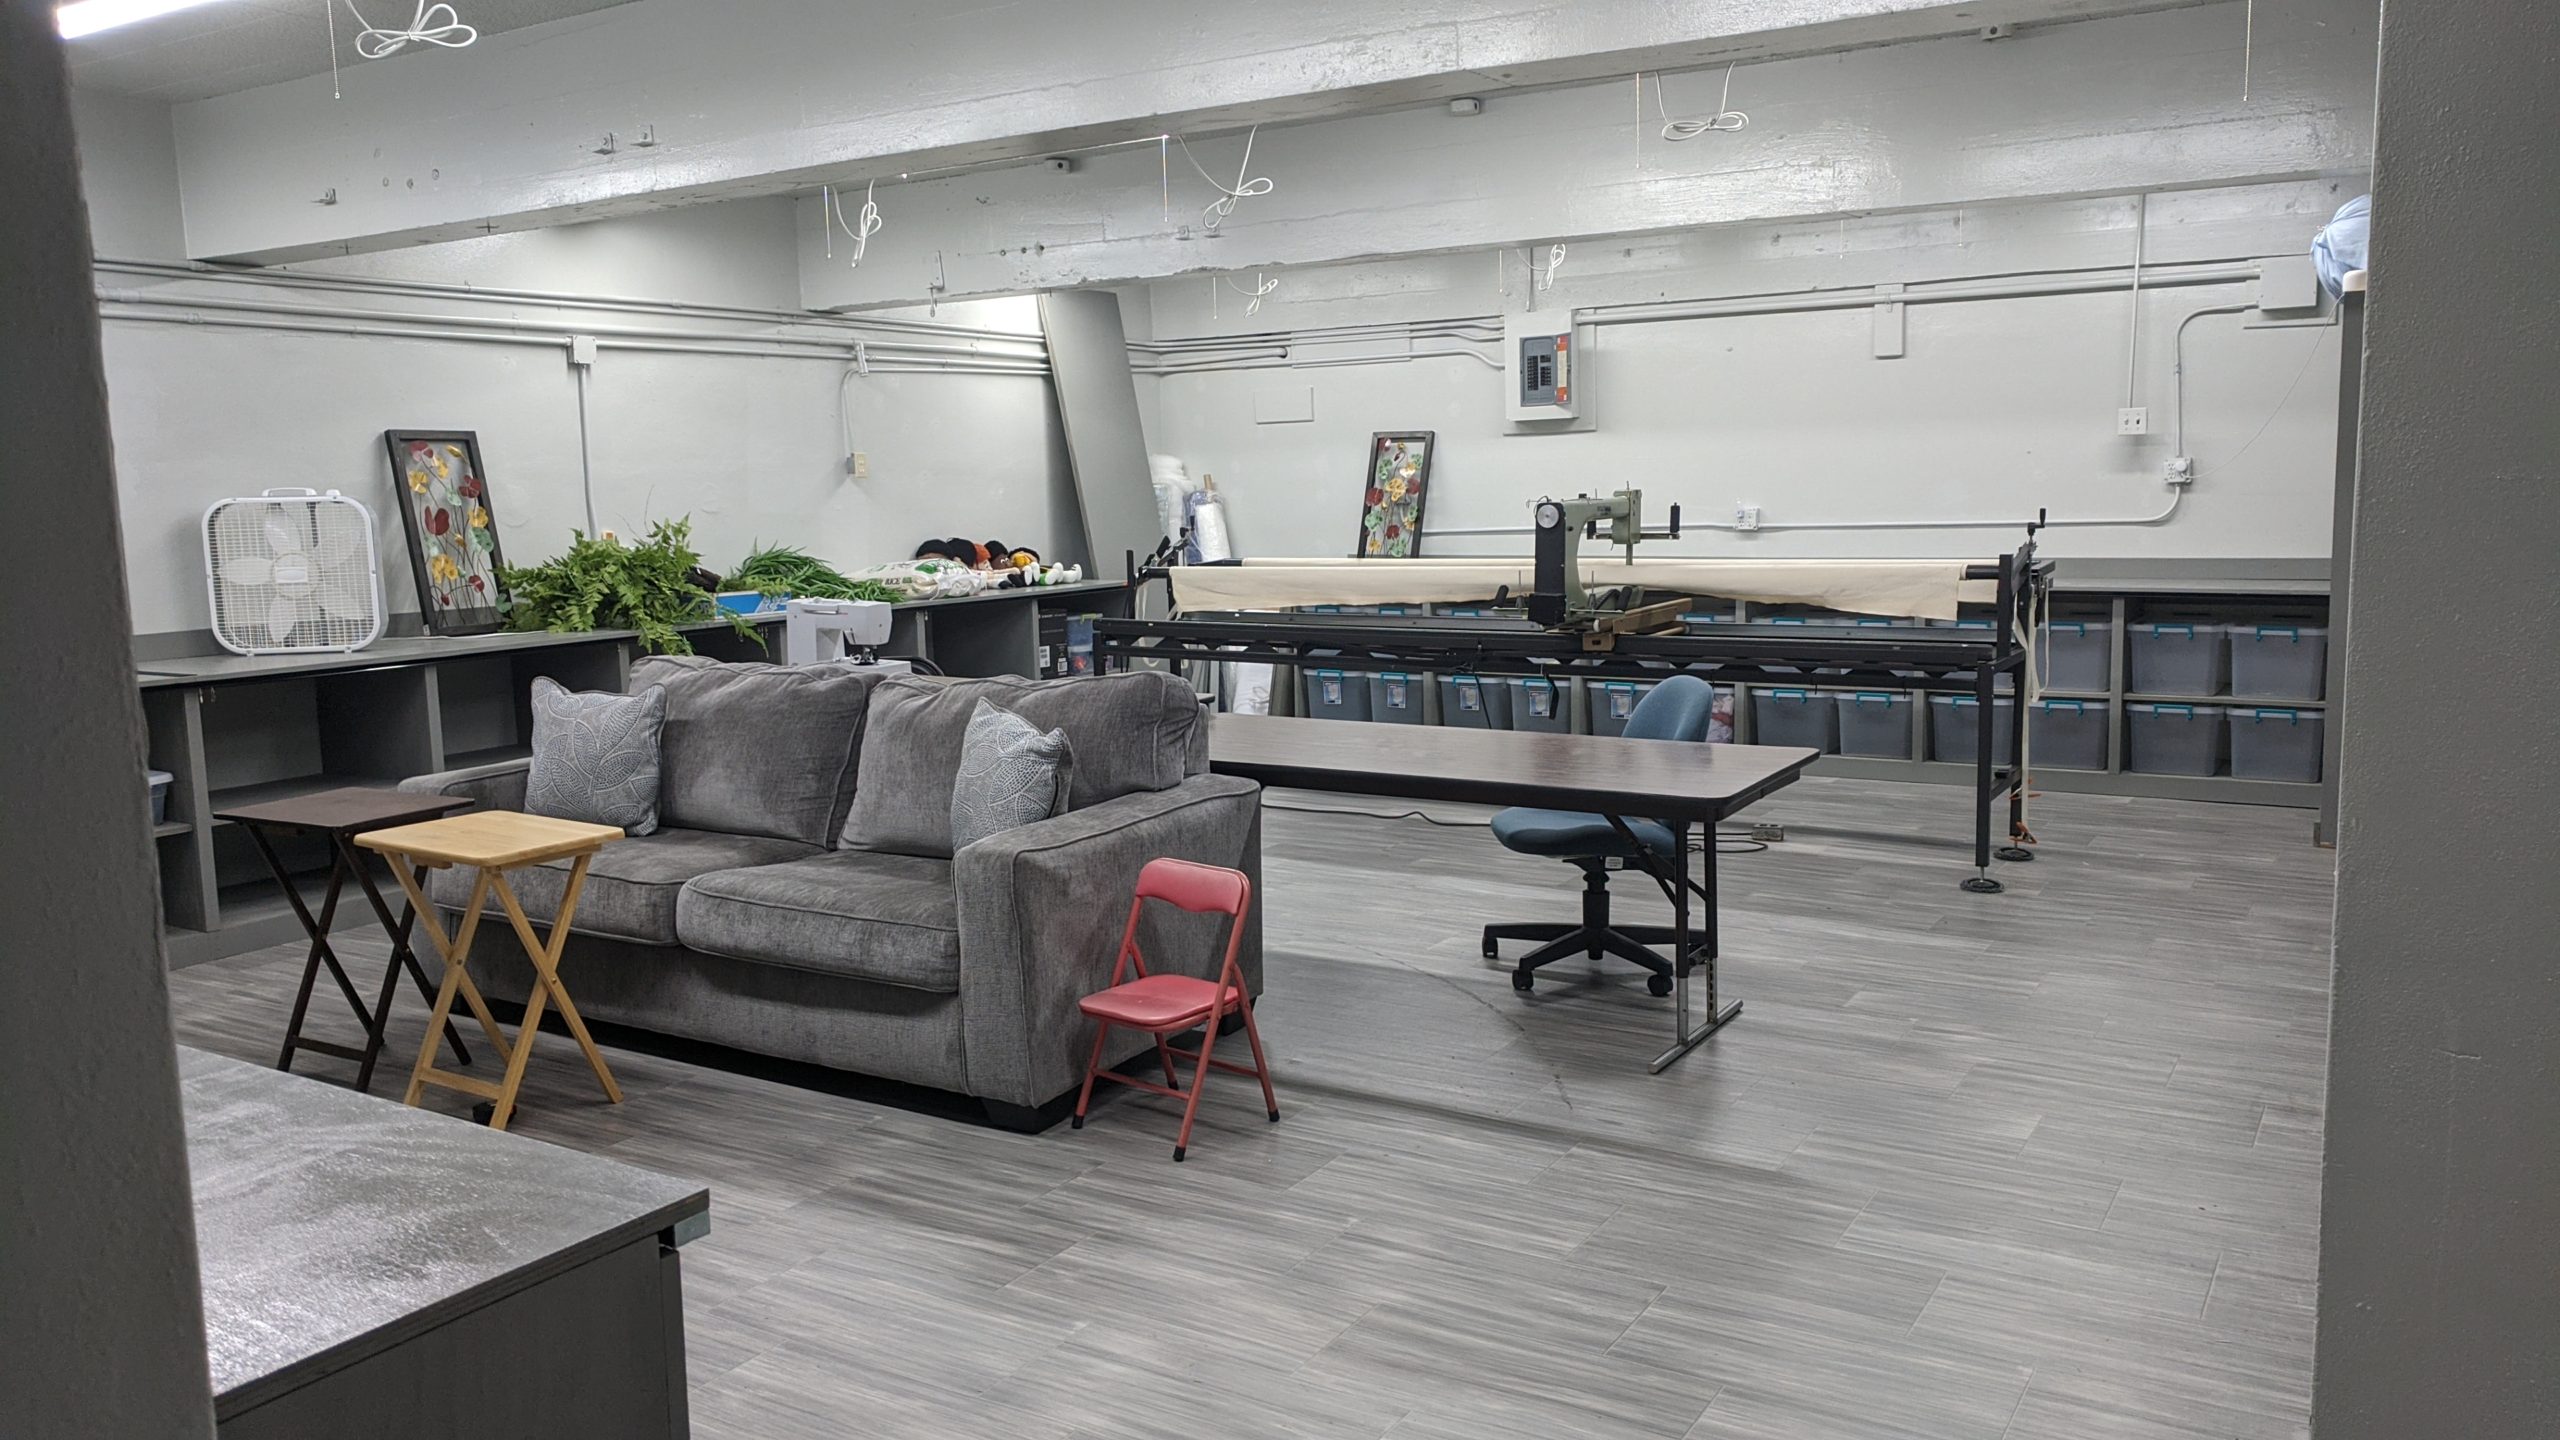
My mother-in-law who comes many weekends to visit likes to tackle many of her sewing projects with some news or other entertainment in the background.  So of course, we had to get a TV and a couch. The furniture store across the street, called Ruddick’s, had just the perfect piece.  And I can’t believe how cheap televisions are now.  We got this 58” bad boy from Wal-Mart for just $278.  That’s 1/3rd the cost of my equivalent TV I got two years ago. My father-in-law had a TV mount on hand from years ago during his home theater installer days.  It worked simply perfect for that space. So, there you have it, the completed room.  You’ll notice my mother-in-law’s long arm quilt machine in the pictures.  That’s a great tool you can use to quilt together a king-size quilt.  That will be one aspect of the business, leasing time on the machine, whether doing it yourself or paying my mother-in-law to do your finished quilt pieces that just need stitched together.

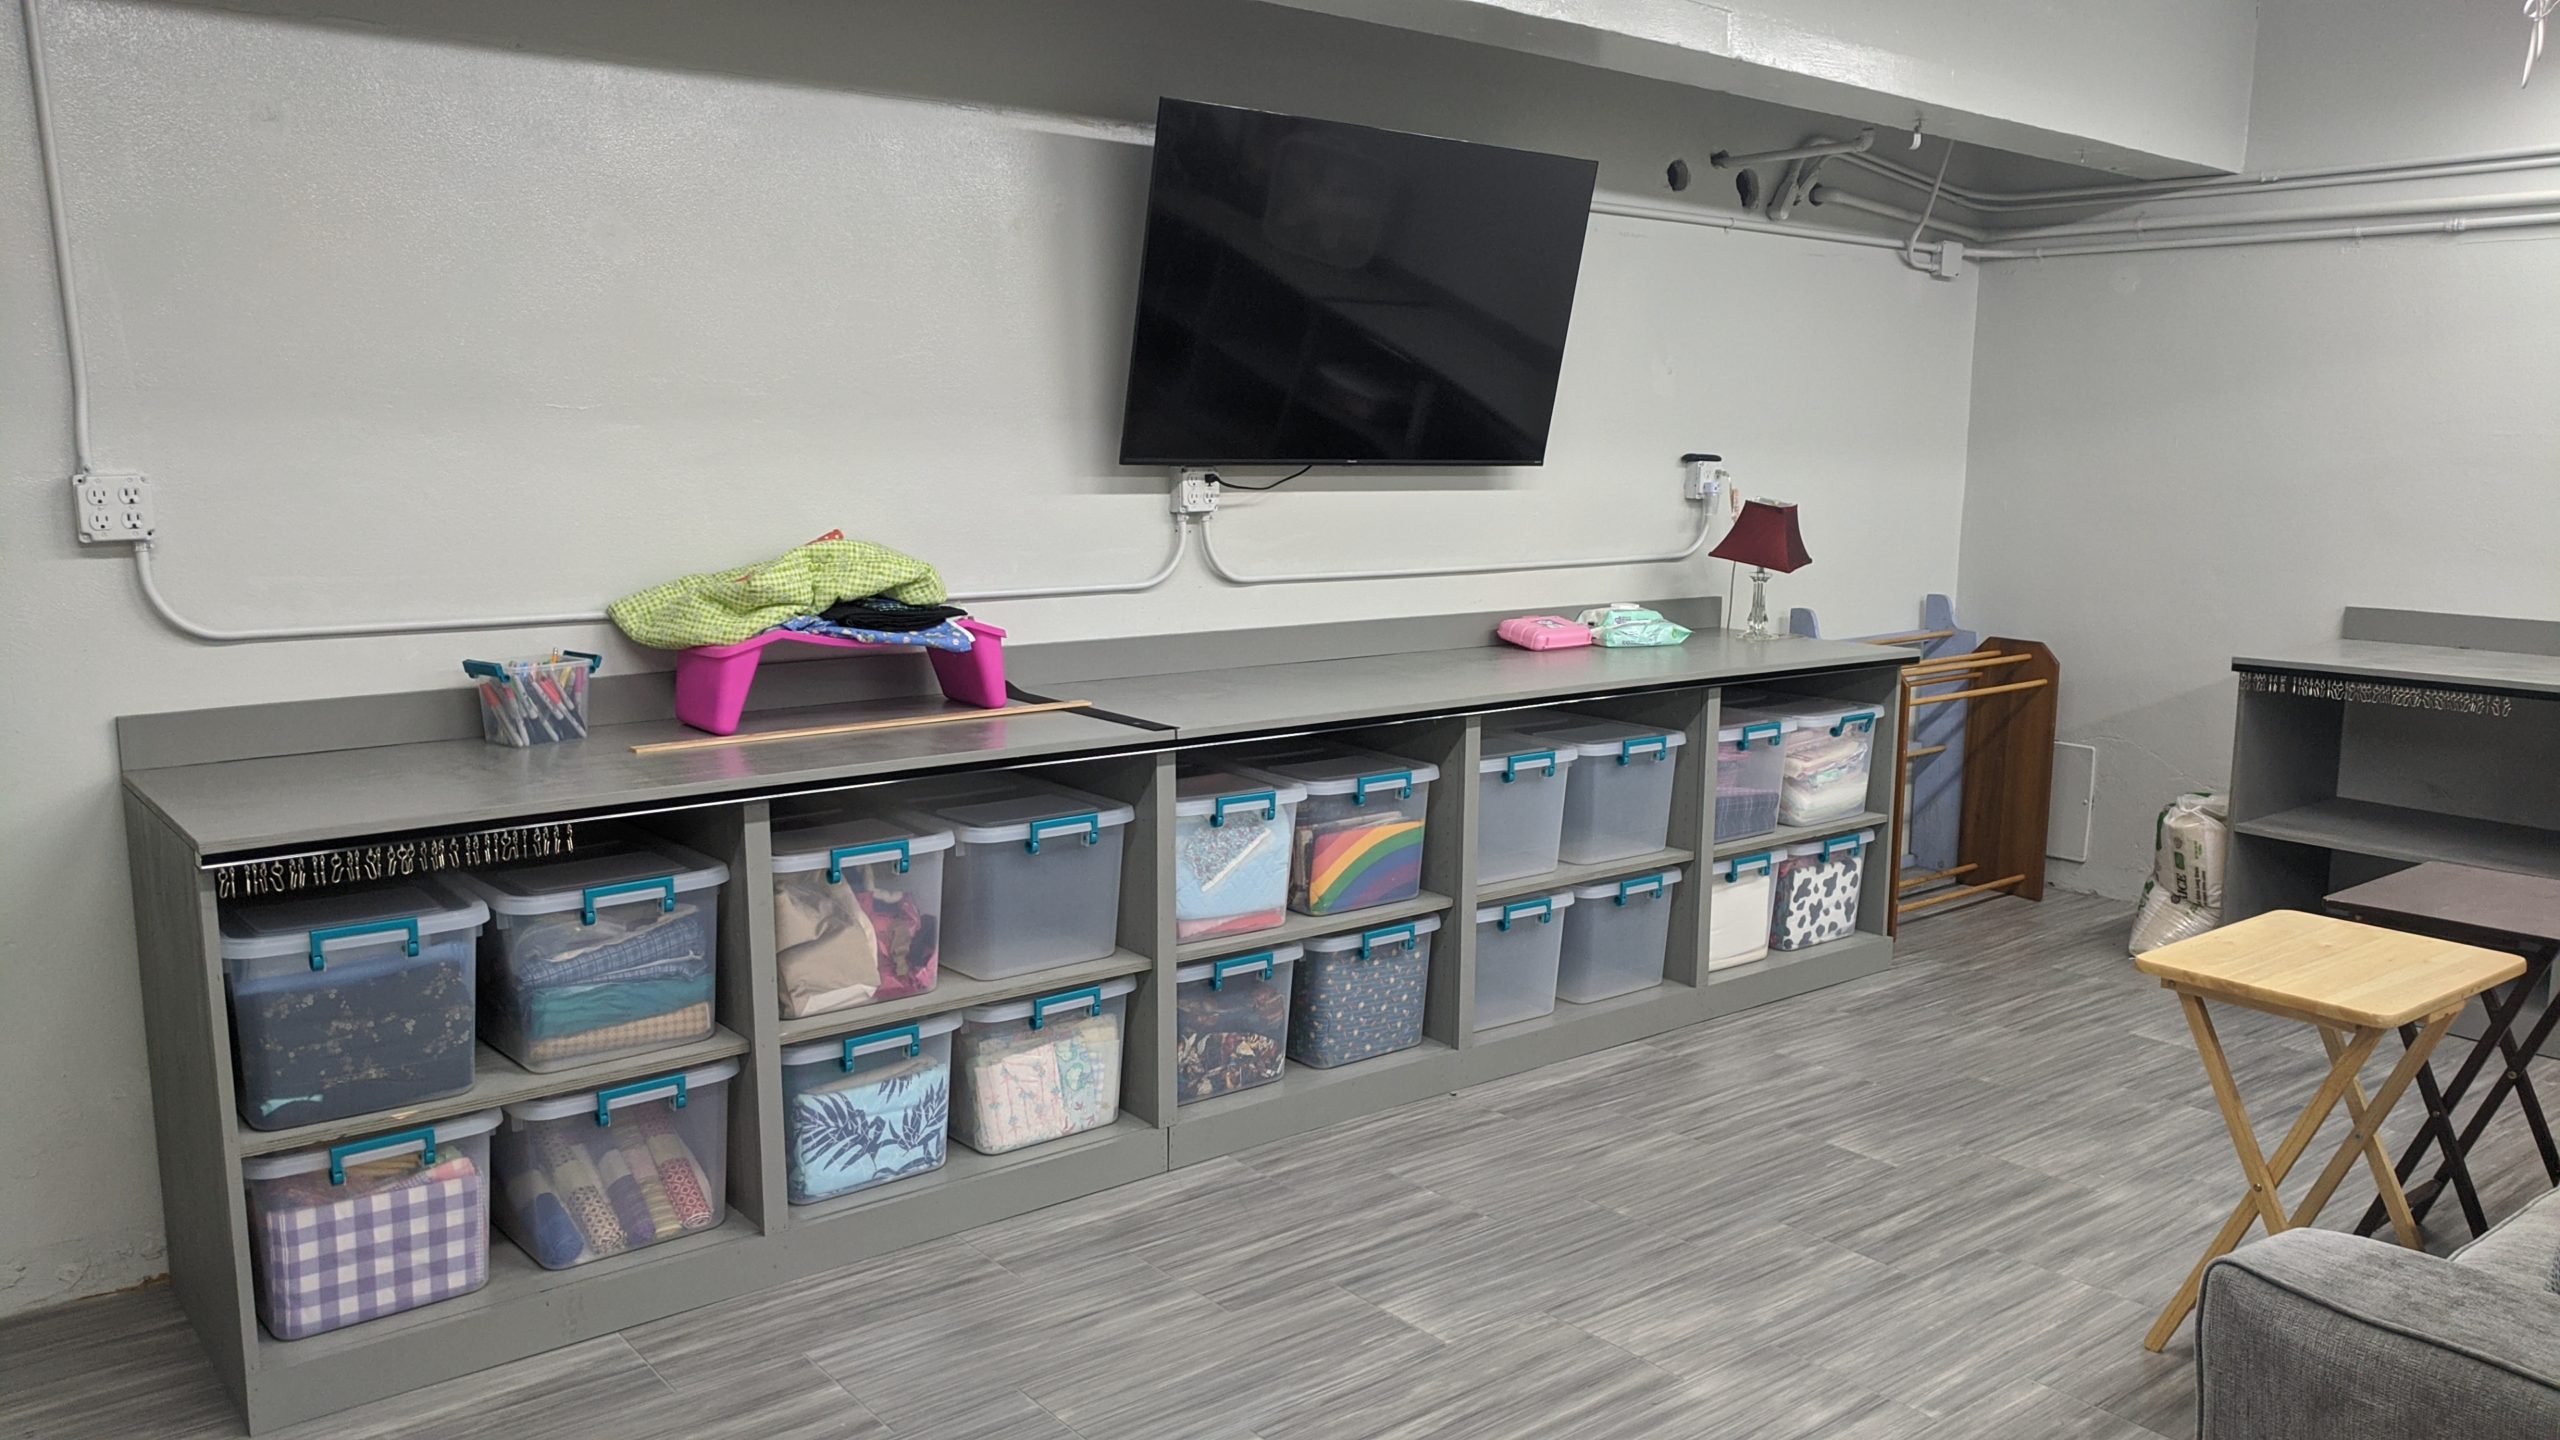
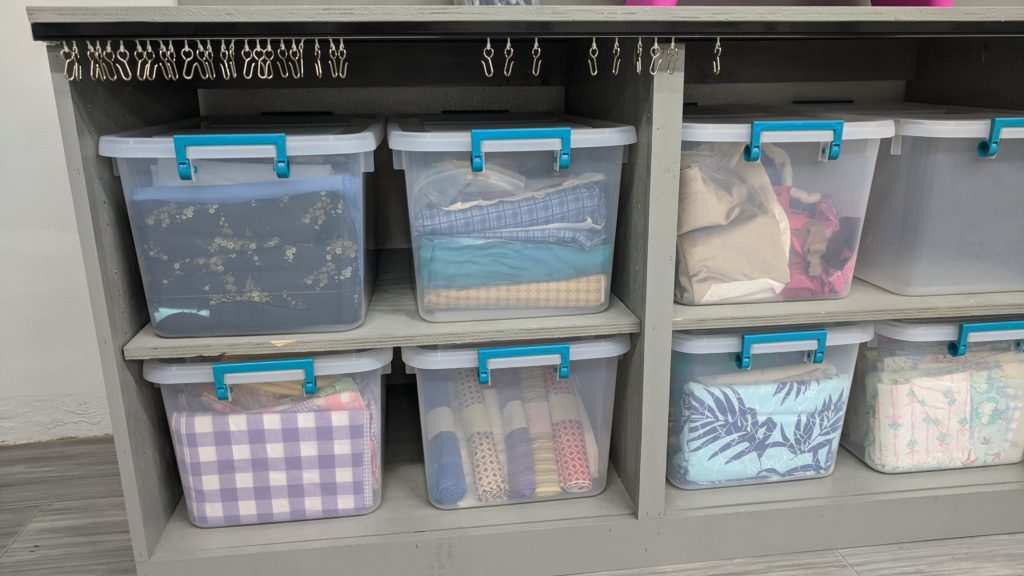
You may notice there aren’t any doors on the cabinets.  My wife and mother-in-law decided they wanted curtains instead.  Their logic is excellent about the space doors need to open. We couldn’t agree exactly how we wanted to do that until I was searching online for curtain rod holders and came across the perfect solution.  Room divider tracks! Just like you often see in a hospital, you can get them and they are so perfect!  I was really worried about the durability of curtain rod hardware so that was my main concern.  As soon as I found these I knew they were the way I wanted to go. I’ll update this in the future when my wife and mother-in-law finish the curtains but here are the tracks for now.

Since I was looking at this project as a personal/family project and not for the museum per se, and I didn’t use any museum funds for it, I didn’t keep super good track of all my expenses to get a real good grand total on the project but here are some pretty good approximations:

Wood/hardware for annex: $800
Wood/hardware for sewing room: $1,200
Flooring, including vinyl and glue: $450
Paint/polyurethane coat: $260
Lighting fixtures: $240
Curtain tracks: $400
TV: $300
Couch: $450
Grand Total: $4,100

Just for fun, here are some bonus before and after shots including more angles.

Categories
Lighting

Project Lighting Retrofit

One of the first projects I decided to tackle was the lighting. There were so many incandescent bulbs in the fixtures that I knew it would be low hanging fruit for lowering the electrical bill by replacing them with LED equivalents. The first task I set out to do was counting all the fixtures and their bulb types so I knew what replacements to order. My findings shocked me. The table below shows how many lights are in this building.  I’ve broken it out between regular lightbulbs and tube lights because the project for replacing those are drastically different and I’ll talk about those separately.

First, a little education so you’ll understand the chart.  As we all know, lightbulbs come in all shapes and sizes.  I’ve always had generic terms that I used for them: Normal, candelabra and flood.  Normal, obviously, being the kind that go in most fixtures that we use every day when we flip the switch. Pretty much the way Edison designed them. Candelabra meaning those with the smaller base that fit in special chandeliers. Finally, flood being those directed ones that are recessed in the ceiling or pointing suspiciously at everyone who comes to our porch. Due to the numerous different fixtures in this place I got learned on all those different shapes and base sizes of bulbs.  Now I could have replaced fixtures but the return on that investment makes changing them a matter of aesthetics instead of money.  So I bought different types of bulbs to fit the existing fixtures. What I considered a normal bulb has two names, one for the shape of the glass/plastic part and one for the base.  The base of a “normal” bulb is E26 and the shape is A19.  A candelabra is an E12 base usually and the shape is B8-13.  If you are so enthralled and want to know more you can visit where I learned this from here: https://www.bulbs.com/learning/basechart.aspx. One last note about that base/size.  There are some that are E26 base but a different size simply because the sconce won’t fit the larger bulbs.

Anyway, I don’t want to bore you too much with the shapes/sizes, on to the chart.

Regular bulbs (Base/Size)

As I was replacing the incandescent light bulbs my brilliant wife said, hey, we don’t have to put all the bulbs in there you know.  Since the main point of this exercise was to reduce energy cost that was like an aha moment.  Sixteen of those G9 bi-pin lights were for fixtures that already had 4 track lights.  They were more decorative than useful and they are in our apartment anyway so that was a no brainer. So not all of these 255 lights will be replaced but on average the candelabra bulbs went from 40 down to 4 watts and the track lighting went from 50 down to 5 watts each.  So on those that’s moving to 1/10th the energy usage.  All but a couple of the E26 bulbs were already fluorescent curly-q light bulbs.  Equivalent LED bulbs only save 1-2 watts from those so it only makes sense to replace those for two reasons: more lumens or when they break.  Until it opens as a museum we don’t need more lumens so for now, those will stay fluorescent.

Speaking of fluorescents.  Since converting fluorescent tube lights to LED was a much tougher job I naturally procrastinated it.  I had a lot of learning to do since I knew I had to rewire.  Fluorescent tube lights use a device called a ballast that is needed to control the current. Fluorescent lights that you just screw in to a normal socket have that built into them.  LED tube lights don’t need a ballast which in turn saves more energy.  A ballast pulls anywhere between 4 and 10 watts, even if the power is off! Rewiring, however, takes a lot of work.  I had a lot of research to do before I was ready.  I eventually found out that there are 3 main types of LED tubes.  Ballast compatible, ballast bypass and ballast agnostic. Ballast compatible are the easiest.  They don’t require any rewiring but that means the ballast is still in there so you don’t get the energy benefit. Ballast bypass means you have to rewire and the ballast agnostic work either way.  Beyond that you can have single ended power and dual ended power which means the rewiring is different.  After lots of research from reading and youtube videos I finally decided on single ended power because the wiring seemed much simpler to me.  So I picked myself up by my bootstraps and got to work.

The very first task was mapping the breakers.  You have to have the electricity off to rewire so we had to do that first.  It wasn’t as simple as it sounds.  This building has 7 breaker panels.  3 in the basement and two on each of the other floors. So with the kids we went to the top floor and I had them stand in different rooms and tell me when the lights went off as I flipped each switch.  With that done, the next morning I did my first fixture. It took 3 hours but I learned a lot doing it. The 2nd one I did that day only took 45 minutes. The next 3 that I did the following weekend only took about 30 minutes each or so. Now on to the numbers.

Fluorescent tubes

So yes, there are 210 fluorescent tube lights of varying size in this building.  The fixtures have between one and four bulbs each.  With that comes all the hazardous materials like mercury, times 210. And that’s not counting the ballasts.  If they are as old as I think (manufacturing date stamp looks like 1959 to me) that means there are all sorts of hazardous chemicals in these fixtures.

In trying to keep up with one of the purposes in buying this building, I taught my oldest two, Michael (15) and Vivian (13) how to remove the ballasts and wire the fixtures.  I offered them $20 per fixture and with around 85-90 fixtures remaining that’ll set me back a cool $1,800 or so but I figure the dividends from them learning to do a hard blue collar type job will be more than worth it. They are already planning on what they will buy with all that money.  Number one on their lists? Pets.

Categories
Uncategorized

Why a Museum?

In 2017 we uprooted our family and made the trek east from Stockton, California to Kansas City, MO.  We were seeking a better quality of life than what we had there.  At the time we had 5 kids (now 6 and done?) and we were living in a 3 bedroom house.  In California, for the house size we wanted, we would be looking at a bare minimum of half a million dollars in Stockton itself. Further north to some of the other cities with better schools and neighborhoods like Elk Grove, CA we’d need at least $700,000. Even further north past Sacramento to where some of the best neighborhoods and schools in Roseville, CA or Rocklin, CA it’d set us back a cool million dollars easy.  All of that was way past our budget and therefore a pipe dream.

I am fortunate to be able to work from home as an IT Business Analyst/Programmer.  Blessed with that it was feasible for us to look outside of California for where that dream of a bigger home, nicer schools and neighborhood could come true.  We found that in Platte Brooke North, Kansas City, MO.  We still love that neighborhood dearly and think it is one of the best we could possibly hope for. Our home was dreamy, sitting atop the hill in our neighborhood, mere minutes from the Line Creek trail, community pool and surrounded by beautiful trees.

In Kansas City, MO we found that better quality of life we were looking for when we left California. Why then did we leave it for this small town with so many unknowns?  The reason was twofold. First, I’ll explain something we’d learned from ecclesiastical leaders, parenting books and our own life experiences. We always knew that we needed our kids to learn how to work harder, the way my dad taught me how to work hard.  My dad was an electrician for four decades before retiring.  Calloused hands, bruised knuckles and blue collared hard worker.  He did a great job teaching my siblings and I how to work hard. Our family has benefited greatly from that ethic he instilled in me. We push our kids in schoolwork and generic household chores but from those leaders and books I spoke of earlier we knew we wanted something more for them to learn from.  One ecclesiastical leader, Gordon B. Hinckley, said that his father moved their family to a farm because he felt they weren’t learning enough about hard work.  We pondered buying a farm as well but with many failed attempts at getting a garden going a) we learned we didn’t have green thumbs and b) we weren’t that into it to be honest.  I hate the idea of lawns for all the water they waste, that may play a part subconsciously as well1. So with that, we didn’t think being farmers could work for us. We’d probably lose interest and just end up teaching our kids how to ignore weeds. So now we have a giant building with many projects for all the age ranges of our kids and at all their different skill levels where they currently are and where they will be eventually.  Tied into that is when the museum is open, we’ll have jobs for them as teenagers to learn how to be responsible employees and simultaneously business owners.

The second reason we decided to make this change is to make our immediate and extended family’s dreams come true. In the about page I’ve talked already about all our hobbies and how we want to share them.  My in-laws deserve the space to showcase their hobbies with the world.  My father-in-law is a 20-year vet from the Air Force. He and my mother-in-law have been serving people their whole lives through church as well, and other social organizations like Boy Scouts of America, quilt guilds, railroad clubs, etc., that they’ve participated in over the years. My children make really great Lego creations that they will be able to show in the Lego portion.  My oldest makes amazing things out of PVC that he will be able to teach to other kids. The other dream this may be able to help come true is that hopefully it will be a financial boon as well. I’m not talking about it making us millionaires but just funding part of our kids’ education both monetarily and in the form of all the things they’ll learn as children of business owners.

In short, we bought a museum because we wanted a vehicle in which to teach our kids how to work hard in a business that their family owns and a place to display our hobbies. In the end time will tell if yanking our kids out of a great education system in Park Hill School District was the right move.  Or if pulling them away from the dear friends they made in KC will do more harm than good. One plus is that we’re not that far away, only about 100 miles, so it isn’t too far to visit on a somewhat regular basis. And with the coronavirus situation, we’re all learning that video calls aren’t so bad. We hope that when hindsight sheds its light on this decision, we will find it was the right one.


1 Not really a subject for the body of this post but I wanted to offer explanation for that seemingly out of nowhere thought.  I’m a firm believer in the good that water charities like WaterAid and Charity Water do. We put cleaner water onto our lawns than a billion people even have access to drink. This is a passion that may come through at other times in this blog.  For further understanding please listen to this podcast from one of the co-authors of the book Freakonomics.
https://freakonomics.com/podcast/how-stupid-obsession-lawns/